
Embroidery Backing Explained: Types, Uses, and How to Choose
August 11, 2026
Embroidery Backing Explained: Types, Uses, and How to Choose
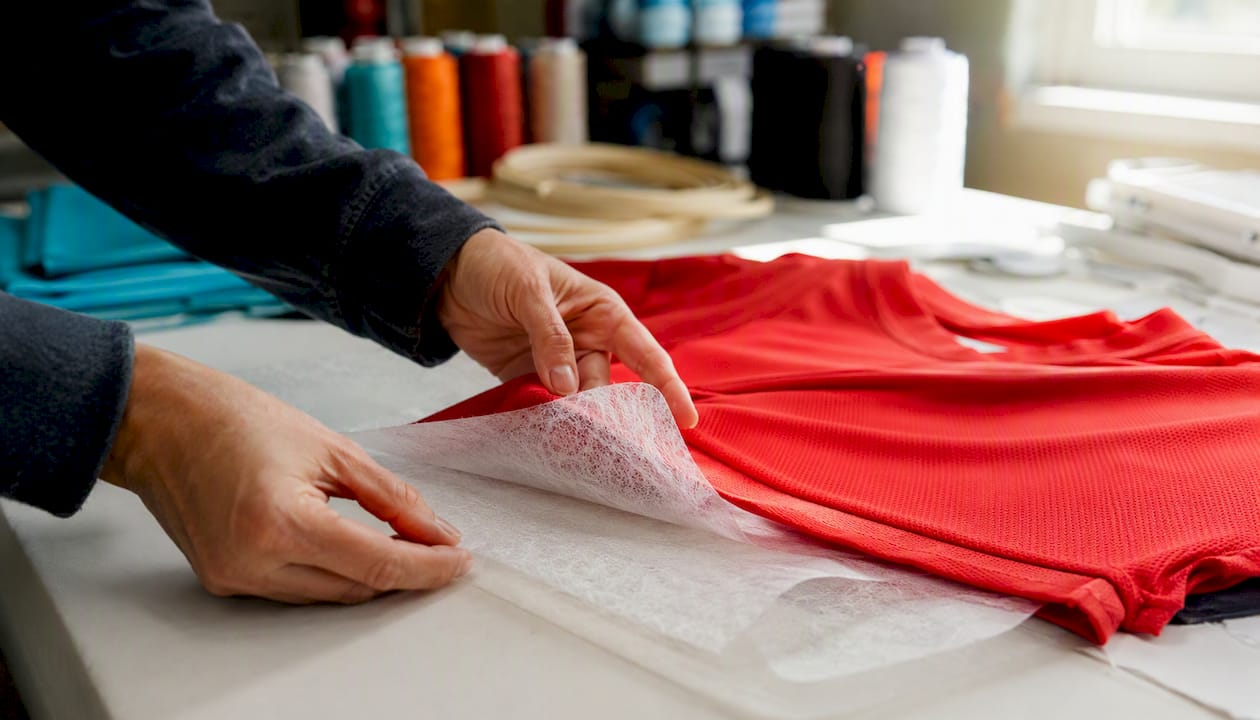
Embroidery backing, also called a stabilizer, is a thin support material placed underneath (or sometimes on top of) fabric during stitching to prevent puckering, stretching, and misalignment while the needle works. Think of it as the foundation that keeps every stitch where you put it. Without it, a dense logo on a knit polo will pucker, a cap emblem will shift mid-run, and a towel design will sink into the pile and disappear. As GPI Supplies explains, stabilizer supports the material while stitches form, and wash-away versions remove entirely when you no longer need them.
Here is a quick cheat-sheet to get you started:
- Knit t-shirts and activewear: medium-weight cut-away or poly mesh (permanent support for stretch fabrics)
- Woven polos, denim, and stable fabrics: light to medium tear-away (easy removal, clean finish)
- Towels and terry cloth: wash-away topping on top + tear-away or cut-away underneath
- Caps and structured headwear: cap-specific backing or heavy tear-away with a rotating frame
- Patches and stand-alone emblems: heat-away or film-backed stabilizer
The one decision rule worth memorizing: fabric stretch + stitch density + visibility of the back side. Those three factors drive every backing choice in this guide.
Key Takeaways
Embroidery backing is the single most important variable between a crisp, long-lasting design and one that puckers, shifts, or falls apart after washing.
| Point | Details |
|---|---|
| Definition | Stabilizer supports fabric during stitching to prevent puckering, stretching, and misalignment. |
| Top pick by fabric | Knits need cut-away or poly mesh; stable wovens use tear-away; towels need wash-away topping plus a backer. |
| Test before production | Always stitch and launder a sample on the same blank before committing to a full run. |
| Cut-away border rule | Leave a 1/8–1/4" border when trimming cut-away; trimming flush weakens the design over time. |
| Layer lighter, not heavier | Two sheets of lighter stabilizer reduce bulk and preserve garment hand better than one heavy sheet. |
Table of Contents
- What is embroidery backing, and what are the main types?
- How to choose the right backing for your project
- How to apply and remove embroidery backing correctly
- Special-case recommendations for caps, towels, knits, and patches
- Where to buy embroidery stabilizers in the United States
- Production and testing tips from experienced embroiderers
- What commercial embroiderers wish their customers knew
- Ready to put this into practice?
- Sources
What is embroidery backing, and what are the main types?
Not all stabilizers behave the same way, and using the wrong one is the most common reason a finished garment looks off. SanMar U’s decorator guide makes the core logic clear: stretchy or lightweight fabrics with high-density designs need heavier cut-away support, while thick, stable wovens can get by with lighter tear-away. Here is a breakdown of every mainstream type.
Cut-away
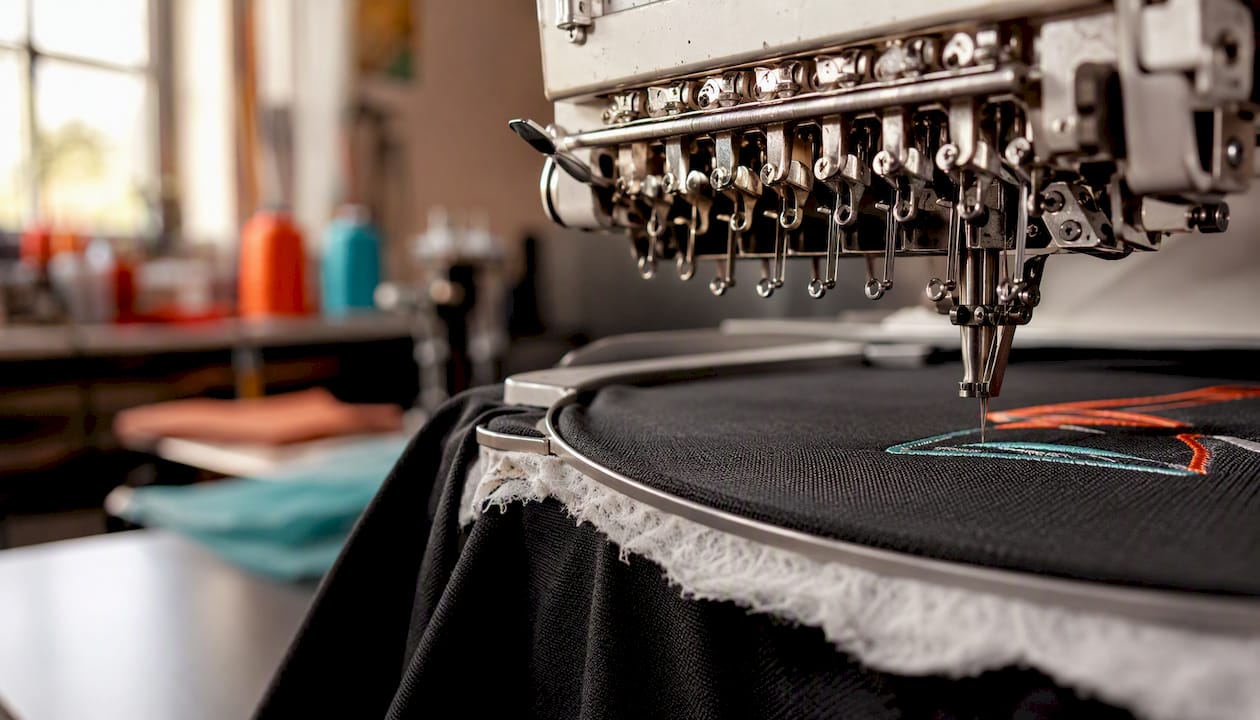
Cut-away is the workhorse of commercial embroidery. You hoop it with the fabric, stitch the design, then trim the excess backing close to the stitches with scissors. The remaining piece stays permanently behind the design, which is exactly what stretch fabrics need. It comes in standard, soft, and poly mesh varieties, each with a slightly different hand feel.
Tear-away
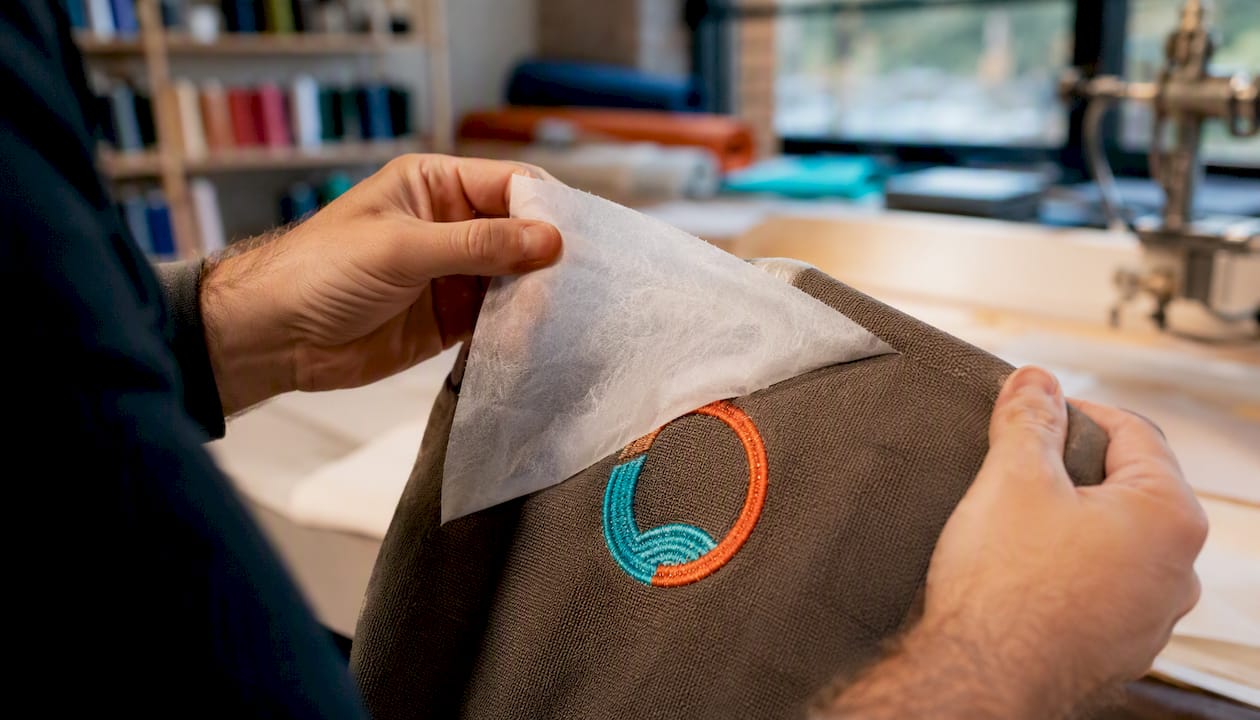
Tear-away is removed after stitching by tearing it away from the design. It works best on stable woven fabrics where the backing does not need to remain for structural support. First Trim’s backing guide notes that commercial tear-aways typically run about 1.5 to 2 ounces per square yard, and the best ones offer clean, easy tears with no perforation resistance that could distort stitches. Tear-away speeds up production significantly on bulk orders.
Wash-away (water-soluble)
Wash-away dissolves completely in water, leaving no residue. It is the right call for stand-alone lace, heirloom cutwork, nylon flags, and any fabric where leftover stabilizer would show or feel stiff. For towels and textured fabrics, a wash-away topping (aqua-top film) is placed on top of the fabric, not underneath, to keep stitches from sinking into the pile. After stitching, you rinse or launder it out.
Adhesive/peel-and-stick
These have a pressure-sensitive adhesive on one side. You hoop the stabilizer alone, peel the paper backing, and press the garment onto the sticky surface. Per First Trim, they are the go-to for collars, cuffs, and any area that would show hoop marks, like brushed denim or suede. No hooping the fabric directly means no ring impressions.
Fusible/interfacing
Fusible stabilizer bonds to fabric with heat before hooping. It adds body to lightweight or loosely woven materials and is common in home embroidery on garments that need a bit of structure, like thin dress shirts or lightweight linen.
Poly mesh (no-show mesh)
Poly mesh is a lightweight cut-away made from a fine, open-weave polyester. It stays behind the design permanently but is thin enough that it does not add bulk or stiffness. It is the preferred choice for performance fabrics, athletic wear, and anything where the back of the garment is visible or touches skin.
Cap backing
Cap backing is a stiff, dense stabilizer cut to fit inside a structured cap. It supports the front panel during stitching and prevents the curved surface from distorting. Most shops use it in combination with a rotating frame or cap frame attachment.
Heat-away
Heat-away stabilizer disappears when you apply a dry iron or heat press. It is used for patches, stand-alone emblems, and delicate fabrics where tearing or washing would damage the work.
Comparison at a glance:
Common use-case pairings:
- Polo shirt with chest logo: light tear-away
- Athletic jersey with large fill design: poly mesh or medium cut-away
- Structured baseball cap: cap backing + rotating frame
- Terry cloth towel: wash-away topping on top, tear-away underneath
- Custom patch: heat-away or film-backed stabilizer
- Sheer or lace fabric: wash-away as the primary backing
Pro Tip: Layering two sheets of lighter-weight stabilizer almost always beats using one heavy sheet. You get the same support with less bulk, and the garment keeps a softer hand. Melco’s stabilizer guide backs this up as a standard production practice.
How to choose the right backing for your project
There is no universal formula here. As Melco’s overview puts it, professionals balance fabric type, stitch count, and washability to find enough support without adding unnecessary bulk. The checklist below gives you a repeatable process.
Selection checklist:
- Fabric construction: Is it a knit (stretchy) or a woven (stable)? Knits almost always need cut-away or poly mesh.
- Stretch level: High stretch means permanent backing. Low or no stretch opens the door to tear-away.
- Stitch density and design size: Dense fill stitches and large designs need more support. A small left-chest logo on a polo is far less demanding than a full-front jacket back.
- Placement: Collar and cuff areas often need adhesive backing to avoid hoop marks. Cap fronts need cap-specific backing.
- Visibility of the back side: If the inside of the garment touches skin directly (a t-shirt, a baby item), poly mesh or a soft cut-away keeps it comfortable.
- Laundering needs: Garments washed frequently need permanent support. Decorative pieces or one-time-use items can use tear-away.
- Garment hand and comfort: Heavier backing stiffens the fabric. For soft, drapey garments, go lighter and layer if needed.
Decision flow:
- Is the fabric stretchy? Yes → cut-away or poly mesh. No → go to step 2.
- Is the fabric heavy and stable (denim, canvas, thick woven)? Yes → light to medium tear-away. No → go to step 3.
- Is the fabric textured (terry, fleece, corduroy)? Yes → add wash-away topping on top, tear-away or cut-away underneath. No → go to step 4.
- Is the placement a collar, cuff, or area that cannot be hooped? Yes → adhesive backing. No → standard tear-away or cut-away based on steps 1–2.
Sample cheat-sheet pairings:
- Knit polo + medium-density chest logo: poly mesh or light cut-away
- Woven Oxford shirt + small left-chest logo: light tear-away
- Fleece hoodie + large fill design: medium cut-away
- Terry towel + dense fill: wash-away topping + tear-away underneath
- Structured cap + front logo: cap backing + rotating frame
- Performance tee + athletic logo: poly mesh
Always stitch a test sample on the same blank you plan to use in production. Launder it once before approving the job. A design that looks perfect off the machine can pucker or distort after one wash if the backing is wrong.
How to apply and remove embroidery backing correctly
Getting the backing on right is half the job. Here is how to do it cleanly, from hooping to final trim.
Application steps:
- Cut backing to size. Cut it slightly larger than your hoop, so it extends about an inch past the hoop edge on all sides. This gives the hoop something to grip.
- Hoop the backing with the fabric. Lay the backing flat, place the fabric on top, and hoop both together. The backing should be taut but not stretched. For knits, avoid stretching the fabric in the hoop or you will get a distorted design when it relaxes.
- For adhesive backing: Hoop the stabilizer alone, score and peel the paper backing, then press the garment onto the sticky surface. Smooth out any bubbles from the center outward.
- For topping (aqua-top): After hooping the fabric and backing, lay a sheet of water-soluble film on top of the fabric surface. You can lightly tape the edges or use a few stitches from the design itself to anchor it.
- For cap backing: Insert the cap backing inside the cap front panel, then load the cap into the rotating frame. The backing keeps the panel rigid during stitching.
Removal steps:
- Tear-away: Hold the design flat with one hand and tear the backing away from the stitches with the other. Tear in multiple directions rather than one long pull to avoid distorting the design. Remove any small remaining pieces with tweezers.
- Cut-away: Use small, sharp embroidery scissors. Trim the excess backing to within 1/8–1/4 inch of the stitches. Per Melco’s guide, trimming too close weakens the foundation and can cause puckering or unraveling over time. Leave that border.
- Wash-away topping: Rinse the finished piece under warm water or launder normally. The film dissolves completely. For stand-alone wash-away backing, the same process applies.
- Heat-away: Apply a dry iron or heat press over the backing area. The material browns and crumbles, then brushes away cleanly. Do not use steam, which can interfere with the process.
Quality cautions:
- Never trim cut-away flush with the stitches. That 1/8–1/4" border is structural.
- When tearing away backing near a collar or seam, hold the seam steady to avoid distortion.
- If the backing tears unevenly and leaves a jagged edge under the design, use scissors to clean it up rather than pulling harder.
Pro Tip: Before trimming cut-away on a finished garment, test your scissors on a scrap piece of the same backing. Dull scissors drag and can pull stitches. Sharp embroidery scissors make a clean cut in one pass.
Special-case recommendations for caps, towels, knits, and patches
Some projects have quirks that general guidance does not cover. Here is the short version for the most common tricky jobs.
-
Structured caps: Use cap-specific backing or a heavy tear-away cut to fit inside the front panel. A rotating cap frame is non-negotiable for consistent registration. Without proper backing, the curved surface causes the design to walk or distort mid-run. For 3D puff designs on caps, the backing needs to be stiff enough to support the foam underlay. Jam4apparel’s embroidered caps guide covers the ordering side of this in detail.
-
Towels and terry cloth: Always use a water-soluble topping on the fabric surface. SanMar U’s guide explains that topping keeps stitches from sinking into the pile on textured fabrics like terry and fleece. Pair it with a tear-away or cut-away underneath depending on the towel’s weight. After stitching, rinse or launder to remove the topping.
-
High-stretch activewear and knit t-shirts: Cut-away or poly mesh only. Tear-away does not provide the permanent support these fabrics need, and after a few washes the design will start to pucker. Poly mesh is the better choice when the back of the garment touches skin directly.
-
Patches and stand-alone emblems: Heat-away or film-backed stabilizer is the standard approach. The backing holds the design during stitching, then disappears with heat, leaving a clean-edged patch ready for application. Some patch workflows use a water-soluble backing instead, especially for lace or cutwork styles.
-
Fleece and brushed fabrics: Treat these like textured fabrics. A wash-away topping prevents stitches from sinking into the nap, and a medium cut-away underneath handles the stretch most fleece carries.
-
Collars, cuffs, and pockets: Adhesive backing is the practical solution here. Hooping a collar directly leaves ring marks that are difficult to remove. Hoop the adhesive stabilizer, peel the paper, and press the collar flat onto the sticky surface instead.
Where to buy embroidery stabilizers in the United States
Stabilizers are widely available across the U.S., from hobby retailers to wholesale distributors. Here is where to look and what to check before you buy.
Major U.S. suppliers and product lines:
- DIME (Designs in Machine Embroidery): Carries a full range of cut-away, tear-away, and wash-away stabilizers with clear weight labeling. Good for hobbyists and small shops.
- Sulky: One of the most recognized names in stabilizer materials, particularly for wash-away (Solvy) and cut-away products. Available at most major fabric and craft retailers.
- Madeira: Known primarily for thread, Madeira also supplies stabilizers and is a reliable source for shops already ordering thread. You can find their thread and supplies at Sewing Machines Plus alongside stabilizer options.
- Gunold (OESD): Produces a wide range of professional-grade stabilizers used in commercial shops. Their products are labeled clearly by weight and type.
- Sewing Machines Plus: A 50-plus-year authorized dealer carrying embroidery machines, stabilizers, and accessories. Useful for hobbyists and small shops looking to buy supplies and equipment in one place. Browse their full embroidery supply selection for stabilizer options alongside machine purchases.
- Amazon and Joann: Convenient for small quantities of common types (tear-away, cut-away, wash-away). Quality varies by brand, so stick to known names.
- Wholesale distributors (SanMar, S&S Activewear): These are apparel distributors, not stabilizer suppliers, but their decorator education resources are worth bookmarking for backing guidance.
What to check on the label before buying:
- Weight: Measured in ounces per square yard. Tear-aways typically run 1.5–2 oz/sq yd. Cut-aways range from light (1.5 oz) to heavy (3+ oz). Match the weight to your fabric and stitch density.
- Sheet vs. roll format: Rolls are more economical for production runs. Sheets work for small batches and sampling.
- Adhesive vs. non-adhesive: Adhesive versions cost more but are essential for hoopless applications.
- Soluble film instructions: Check whether the wash-away product requires warm or cold water and how long it takes to dissolve fully.
- Recommended fabric pairings: Most reputable brands include this on the packaging or product page.
Production and testing tips from experienced embroiderers
Commercial shops have learned these lessons the hard way. Here is what separates a consistent production workflow from one that generates rework.
The tear-away vs. cut-away trade-off in production:
Impressions Magazine’s decorator guide lays this out plainly: shops choose tear-away for bulk orders on stable woven fabrics because it speeds production and cuts trimming labor. Cut-away is reserved for knits and stretch fabrics where the backing must stay in the garment permanently. Using cut-away on everything is slower and adds unnecessary bulk to stable garments. Using tear-away on knits is a quality failure waiting to happen.
Testing checklist before production:
- Stitch a 2–3 inch test on the same blank you plan to use, not a generic scrap.
- Check registration after the first 500–1,000 stitches. If the design is walking, the backing is wrong.
- Launder the test piece at least once before approving. Some puckering only shows after washing.
- Note the needle size and thread type used. These affect how the backing performs.
Managing supplier variance:
Identical garment styles from different suppliers can behave completely differently under the needle. A 100% cotton polo from one brand may be a tighter weave than the same-style polo from another, which changes how much backing support you need. Keep a sample library: one stitched and laundered test piece per blank per supplier, with notes on backing type, weight, and any adjustments made. When a supplier changes or goes out of stock and you swap to a new source, run the test again before committing to a full run.
Pro Tip: Two sheets of lighter-weight stabilizer almost always outperform one heavy sheet. You get equivalent support, less bulk, and a softer garment hand. Melco’s production guide treats this as standard practice for commercial shops.
What commercial embroiderers wish their customers knew
Here is a perspective worth hearing before you place your next order.
The single biggest source of rework in commercial embroidery is not a bad design file or a slow machine. It is a backing choice made without knowing the fabric. A customer brings in a soft athletic hoodie, the shop runs it with the same tear-away they use on woven polos, and after two washes the chest logo starts to pucker at the edges. The fix is straightforward: switch to cut-away. But by then, the garments are already out the door.
Testing every new blank is not optional in a serious shop. A style that ran perfectly last season on one supplier’s fabric may need a completely different backing when the supplier changes their mill. The garment looks identical on the outside. The construction is not. Skipping the test to save time on a 500-piece run is how you end up reprinting 500 pieces.
The other thing customers rarely think about is the back of the garment. Cut-away left with rough edges or trimmed too close is uncomfortable against skin, especially on t-shirts and athletic wear. A soft cut-away or poly mesh, trimmed cleanly with a 1/8-inch border, is barely noticeable. Rough-cut standard cut-away on a thin t-shirt is the first thing the wearer notices when they put it on.
Clear communication with your decorator makes a real difference. Tell them the fabric content, the intended use (daily wear vs. a one-time event), and how often the garment will be washed. Those three details alone let a good shop pick the right backing without guessing. Avoiding common custom apparel ordering mistakes starts with that conversation.
Ready to put this into practice?
If you are ordering custom embroidered apparel for your team, business, or organization, the backing choice is handled for you when you work with a shop that knows what it is doing. Jam4apparel’s in-house embroidery team in Lake in the Hills, Illinois, selects the right stabilizer for every blank, every design, and every end use, from custom embroidered hats and polos to uniform programs and team gear. Browse Jam4apparel’s industry solutions to find the right fit for your project, or request a free quote directly.
Sources
These resources were used in building this guide and are worth bookmarking for deeper reading and product specs.
- Choosing the Right Embroidery Backing For the Right Apparel | SanMar U
- Stabilizer Backing Overview | Melco (Zendesk)
- Selecting the Correct Embroidery Backing For the Right Apparel | Impressions Magazine
- 6-Types of Embroidery Backing | First Trim
Recommended
Ready to print your design?
Screen print, embroidery, and DTF — no minimums on many styles.