Embroidered Caps for Teams: What to Order and Why
July 31, 2026
Embroidered Caps for Teams: What to Order and Why
An embroidered cap for teams is a custom hat with your team’s logo or text stitched directly into the fabric, producing a textured, durable mark that holds up through seasons of wear. If you’re choosing between decoration methods, pick embroidery every time for uniforms, long-term programs, or anything your team will wear repeatedly. Printed decoration fades; embroidery outlasts the cap itself.
The two things that make embroidered caps the right call for teams: a structured cap gives the embroidery machine a stable, flat surface, and the stitched result carries a perceived quality that printed hats simply don’t match. Coaches ordering for a youth tournament, HR managers building a company uniform program, and event coordinators handing out branded headgear all land on the same answer for the same reason.
Table of Contents
- Why teams choose embroidered caps over other options
- Which cap styles work best for team orders
- What embroidery techniques actually look like on a cap
- What to give your embroiderer so the result matches your vision
- How a team cap order actually works, step by step
- What drives the price of custom team caps
- How to keep embroidered caps looking sharp over time
- Research-backed reasons embroidered caps hold up for team branding
- Key Takeaways
- Why the conventional wisdom on cap ordering gets it backwards
- Get your team caps made right with Jam4apparel
- Useful sources and further reading
Why teams choose embroidered caps over other options
Durability is the first reason, and it’s not close. Screen printing on curved cap surfaces creates registration challenges and degrades faster than stitching. Embroidery holds through repeated washing and daily wear in a way that heat transfers and printed decoration don’t.
The second reason is brand visibility. A well-made team logo hat travels everywhere its wearer goes — tournaments, commutes, social media photos. Industry experts describe embroidery’s “tangible quality” as the factor that turns caps into walking brand ambassadors, because recipients keep and wear them far longer than printed alternatives.
Team unity is the third, and it’s underrated. When every player, coach, or staff member wears the same personalized team headgear, the visual signal is immediate. It reads as intentional. It tells anyone watching that this group is organized. That matters at youth tournaments, corporate events, and trade shows alike.
- Embroidery outlasts the cap itself through hundreds of washes
- Stitched logos photograph better than printed ones at distance
- Matching caps create instant visual cohesion for staff and players
- Recipients keep embroidered caps longer, extending brand exposure
- Embroidered caps work as corporate uniform apparel and event giveaways
Pro Tip: For maximum visibility, choose a thread color at least two shades away from the cap base. A navy cap with white thread reads from 30 feet; navy on black disappears at 10.
Which cap styles work best for team orders
The cap’s construction is the dominant technical factor. Buckram-backed structured fronts give embroidery machines a stable surface; without that backing, logos pucker regardless of how well the design is digitized. That single fact drives most style recommendations for teams.
Structured six-panel baseball cap
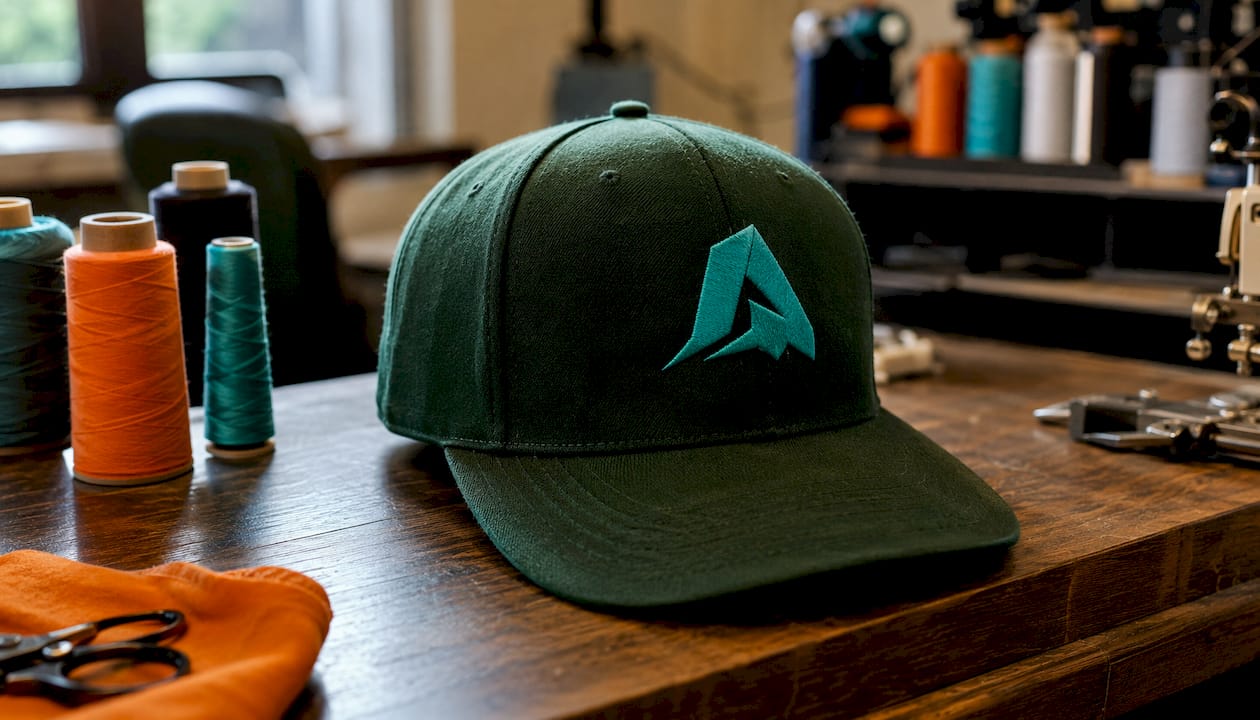
The default choice for a reason. The buckram lining holds the front panel flat, so the embroidery sits cleanly and consistently across every cap in a run. Six-panel construction gives you the most usable front space, typically 2.5–4 inches wide, and no center seam to interrupt a logo. Best for uniforms, staff caps, and any program where consistency matters.
Snapback
Essentially a structured cap with a flat brim and snap closure. Front panel rigidity matches a standard baseball cap, so embroidery results are equally sharp. The flat brim adds a design surface, and the adjustable closure means one size covers most of your team without collecting individual measurements.
Trucker cap
Foam front panel, mesh back. The foam front is firm enough for clean embroidery and the mesh keeps it breathable for outdoor use. Popular for youth sports and summer events. The higher-profile front can accommodate slightly larger logos.
Dad hat (unstructured)
Soft, unstructured front with no buckram. Embroidery results are softer and less precise, which works well for a vintage or casual aesthetic but is the wrong call for a crisp team logo. Use it for lifestyle merch or casual giveaways, not uniforms.
Performance cap
Moisture-wicking fabrics for athletic use. Embroidery is possible but stitch density needs to stay lower to avoid restricting the stretch. Best for on-field or on-court wear where breathability matters more than logo sharpness.
| Style | Best embroidery type | Ideal use case | Key consideration |
|---|---|---|---|
| Structured 6-panel | Flat or 3D puff | Uniforms, staff caps | Most predictable results |
| Snapback | Flat or 3D puff | Youth teams, streetwear | Adjustable; flat brim adds space |
| Trucker | Flat embroidery | Outdoor sports, events | Breathable; higher profile |
| Dad hat | Flat, tonal thread | Casual merch, giveaways | Softer result; no buckram |
| Performance cap | Flat, low density | On-field athletic wear | Stretch fabric limits stitch count |
What embroidery techniques actually look like on a cap
Flat embroidery
The standard. Thread stitches directly onto the cap surface with no underlay material raising it. The result is clean, precise, and works on every cap style. It handles fine detail, small text, and complex marks better than any other technique. If you’re unsure, flat embroidery is the right default.
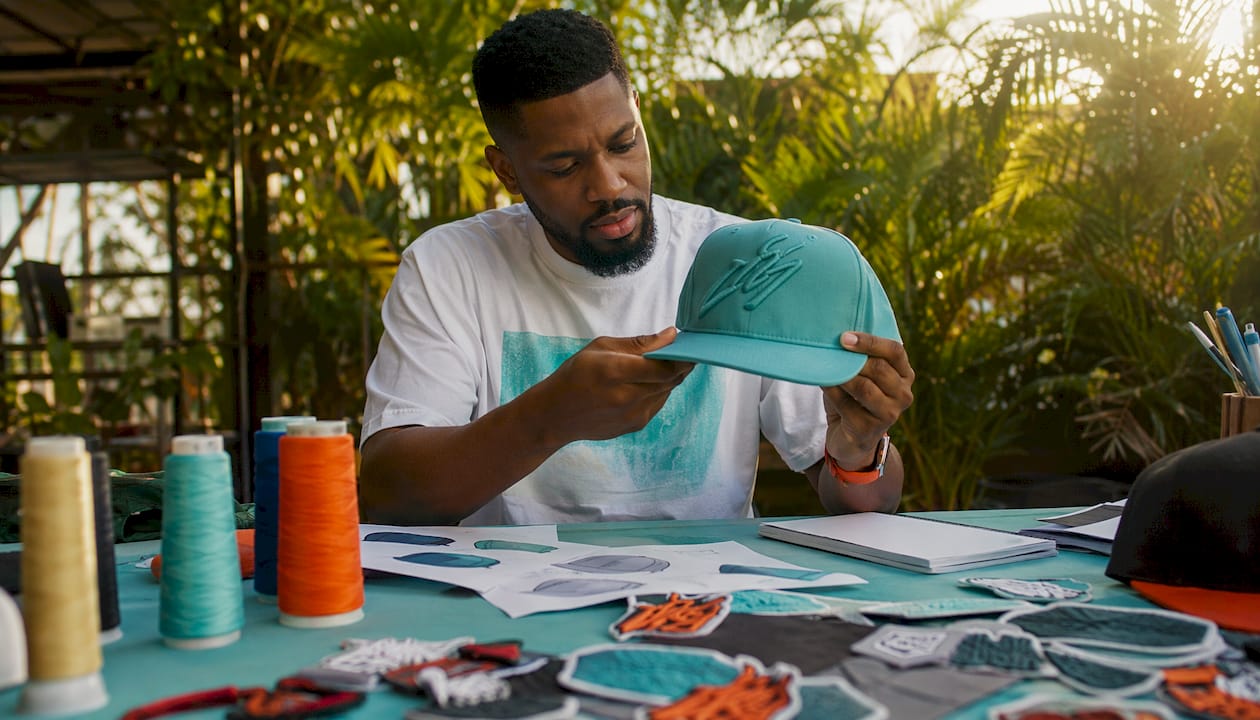
3D puff embroidery
A thin foam layer goes under the thread, raising the design off the surface for a dimensional, sculptural look. The effect reads immediately as bold and premium. The hard limit: fine detail does not work in 3D puff. The foam distorts thin lines and small text. Letters need to be larger and bolder. Reserve this technique for simple, clean team marks where the shape is the statement.
Applique and patch options
For heavily detailed or multi-material logos, a custom embroidered patch applied to the cap front can reproduce complexity that direct embroidery can’t. Woven, leather, and PVC patches are all options. Patches also let you swap designs across cap styles without re-digitizing.
Tonal vs. contrast thread
Tonal thread (close to the cap color) creates a subtle, textured look suited to lifestyle brands and premium giveaways. Contrast thread (opposite end of the color wheel from the cap) maximizes visibility and reads clearly in photos. For team caps where recognition matters, contrast almost always wins.
Pro Tip: Only choose 3D puff if your team mark is a bold, simple shape with no thin lines or small text. When in doubt, request a flat sew-out first and compare.
What to give your embroiderer so the result matches your vision
Getting the artwork right before production starts saves time and money. The most common source of disappointing results is a logo submitted at the wrong size or in a format that forces the digitizer to guess at details.
File formats to provide:
- Vector files (AI, EPS, PDF) are preferred because they scale without quality loss
- High-resolution PNG (300 dpi minimum) is acceptable when vector isn’t available
- Avoid low-resolution JPEGs — they force the digitizer to interpret blurry edges
Logo size and stitch density:
Logo width on structured caps should run 2.5 to 4 inches depending on complexity. Minimum letter height is 4mm for block text and 5–6mm for serif or script fonts. Below those minimums, letter details merge and text becomes illegible.
Before you submit, check these:
- Confirm your logo is the right width for the cap style you’ve chosen
- Map every color to a Pantone or Madeira thread code (don’t leave it to interpretation)
- Check that all text is at least 4mm tall in the final embroidery size
- Remove thin lines, gradients, and photorealistic elements that won’t translate to thread
- Prepare a simplified, flattened single-color version for the digitizer’s reference
When to simplify your logo:
If your mark has thin strokes, drop shadows, or more than five colors, simplify it for cap scale. A version with clean outlines and bold shapes will look sharper at 3 inches than a faithful reproduction of a complex original. Five-panel caps have a center seam that can split a logo, so six-panel is safer for centered designs.
Pro Tip: Always provide a flattened, single-color version of your logo alongside the full-color file. Digitizers use it to map the structure of the design before assigning thread colors.
How a team cap order actually works, step by step
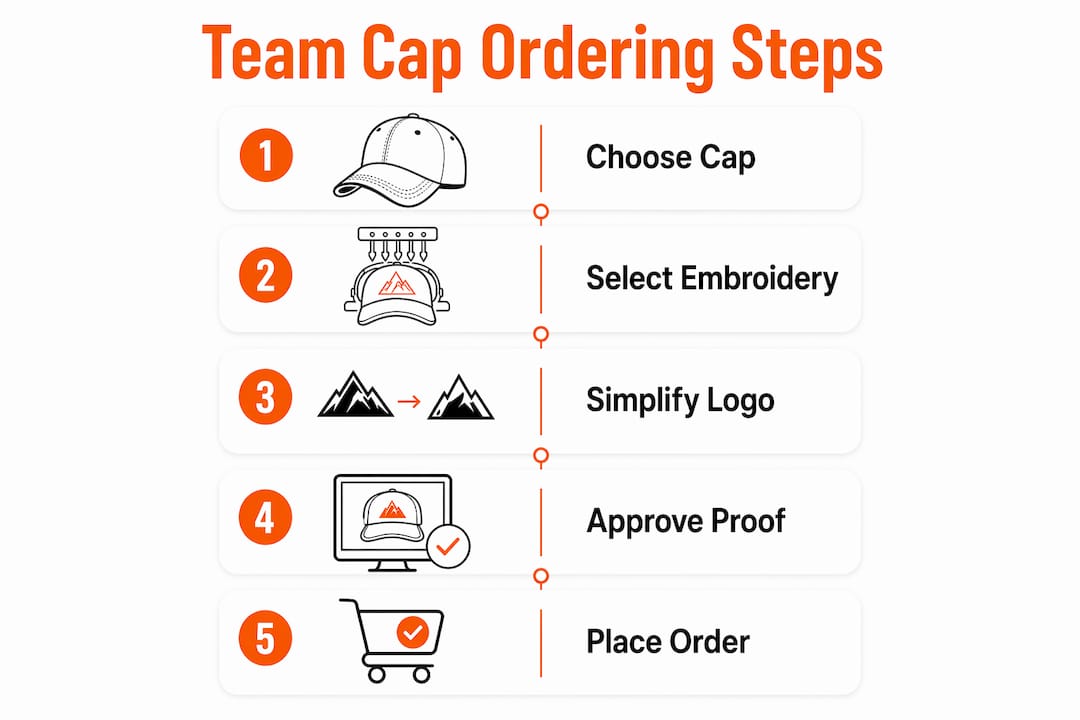
- Choose your cap style and closure. Structured six-panel with an adjustable snapback or hook-and-loop closure is the safest default for most team orders. It fits most wearers without collecting individual sizes.
- Submit your artwork. Send your vector file (or high-res PNG), specify placement (front center is standard), approximate size in inches, thread color references, and quantity.
- Approve the digital proof. Your provider digitizes the logo and sends a proof showing stitch paths and thread colors. Review it carefully — this is your last chance to catch issues before production.
- Approve a physical sew-out (for larger orders). For runs above a certain quantity, request a physical sample stitched on the actual cap. What looks right on screen can surprise you in thread.
- Production runs. Once you approve, production begins. Typical windows run 7–21 business days depending on quantity and complexity.
- Delivery and distribution. Caps ship to one address or, for large multi-location teams, in pre-labeled bundles by location or roster group.
Timing and MOQ notes:
- Most providers set minimum order quantities per style, color, and logo combination
- Rush service is usually available for an upcharge; confirm lead time before committing
- Adjustable closures reduce SKU count dramatically for large team orders — one size fits most instead of ordering S/M/L/XL fitted caps
Jam4apparel offers a free design proof and handles in-house digitizing, which cuts the back-and-forth that adds days to orders placed through third-party decorators. Request a quote directly and the proof comes back before you commit to production.
What drives the price of custom team caps
No two orders cost the same, but the pricing variables are predictable once you know them.
Primary cost drivers:
- Cap style and base cost: Performance and premium structured caps cost more than standard cotton twill
- Stitch count: More stitches mean longer machine time and higher per-unit cost
- Thread colors: Each additional color adds complexity and sometimes changeover time
- Decoration type: 3D puff and patch applications typically cost more than flat embroidery
- Quantity: Per-unit cost drops as quantity rises; the digitizing fee amortizes across the run
- Turnaround: Rush production carries a premium
Digitizing fees:
Digitizing is a one-time setup cost that converts your artwork into machine-readable stitch files. On a small run of 12 caps, that fee is a significant share of the total. On a run of 144, it barely registers per unit. This is why per-unit pricing drops sharply as quantity increases.
Sample ranges (approximate, not guaranteed):
- Small team orders (12–24 caps): higher per-unit cost due to setup amortization
- Mid-size orders (48–72 caps): per-unit cost drops noticeably; most teams hit their best value here
- Large orders (144+ caps): lowest per-unit cost; bulk pricing and simplified logistics
Adjustable caps reduce the number of SKUs you need to manage, which keeps fulfillment costs down and minimizes the risk of leftover inventory in sizes nobody wanted.
Note: Always request an itemized quote that separates the digitizing fee from the per-unit decoration cost. That way you can compare providers accurately and understand what changes if you increase quantity.
How to keep embroidered caps looking sharp over time
Embroidery is durable, but the cap’s structure needs care too. A crushed brim or a puckered front panel undermines the logo even when the stitching itself is fine.
- Wash by hand or on a gentle cycle inside a mesh garment bag; avoid hot water, which can shrink the cap and loosen thread tension
- Air dry only — reshape the brim over a round object (a bowl works) while the cap is still damp
- Never put embroidered caps in the dryer; heat distorts buckram and can cause puckering around the logo
- Store structured caps upright or on a cap rack, not stacked under other items
- Spot-clean the embroidery with a damp cloth and mild detergent rather than soaking the whole cap when possible
- For loose threads, trim them cleanly with small scissors rather than pulling; pulling can unravel adjacent stitches
Pro Tip: Use a small amount of mild detergent (like Woolite) and cold water for hand washing. After rinsing, press a clean towel gently against the embroidery to absorb water, then reshape the brim before air drying.
Research-backed reasons embroidered caps hold up for team branding
The case for embroidery over printing isn’t just aesthetic. Embroidery is the standard decoration method for structured caps in branded programs precisely because screen printing on curved surfaces creates registration problems and degrades faster. That’s why team uniform programs default to stitching.
Structured caps with buckram-backed fronts consistently produce the sharpest, most repeatable results across a production run. The stable surface is what makes consistency possible at scale — a critical factor when you’re ordering 60 caps and need every logo to look identical.
For 3D puff specifically, the foam layer that creates the dimensional effect also limits what the technique can reproduce. Bold, simple marks thrive; anything with thin strokes or small text distorts. Knowing that boundary before you design saves a revision cycle.
Jam4apparel’s in-house production means digitizing, proofing, and decoration all happen under one roof. That matters for quality control: when the person digitizing your file and the person running the machine are in the same building, errors get caught before they become a full run of wrong caps.
Key Takeaways
Embroidered caps are the right choice for teams because stitched logos outlast printed decoration, project a premium look, and create visual unity that printed alternatives can’t match.
| Point | Details |
|---|---|
| Choose structured six-panel | Buckram-backed fronts give the most predictable, consistent embroidery results across a team run. |
| Size logos 2.5–4 inches wide | Keep logo width within this range and letter height at 4mm minimum for legible results at cap scale. |
| Use adjustable closures | Snapback or hook-and-loop closures fit most wearers and cut SKU complexity for large team orders. |
| Reserve 3D puff for bold marks | Only use raised embroidery for simple, clean shapes; flat embroidery handles fine detail and small text. |
| Jam4apparel for team orders | Request a free proof and in-house production quote at Jam4apparel for fast Chicagoland turnaround. |
Why the conventional wisdom on cap ordering gets it backwards
Most guides tell you to start with the logo and then find a cap. That’s the wrong order. The cap’s construction determines what your logo can actually look like in thread, and choosing the wrong base means even a well-digitized design produces a mediocre result.
The second thing people consistently underestimate is the simplification step. Teams come in with a complex, multi-color crest that looks great on a jersey where it’s printed at 4 inches. At cap scale, that same mark becomes a muddy cluster of stitches. The teams that end up with caps they’re proud of are the ones that invested 20 minutes creating a clean, simplified version of their mark specifically for embroidery. It’s not a compromise; it’s a different medium with different rules.
The third overlooked point: adjustable closures aren’t just convenient, they’re a logistics decision. Collecting hat sizes from 40 players or 80 employees is a project. Ordering one adjustable style in one size eliminates that entirely and reduces the chance of leftover inventory. For most team programs, fitted caps are the wrong call unless the aesthetic specifically requires them.
Get your team caps made right with Jam4apparel
Jam4apparel produces custom embroidered hats for sports teams, school programs, corporate staff, and event crews throughout the Chicagoland area. In-house digitizing means your artwork gets converted and proofed by the same team running your order, which cuts turnaround time and eliminates the miscommunication that happens when decoration is outsourced.
Services include flat embroidery, 3D puff embroidery, custom patches for complex logos, and bulk ordering support for large team runs. Every order starts with a free design proof so you see exactly what your cap will look like before a single stitch is made. Request a quote at Jam4apparel and get your team’s caps into production.
Useful sources and further reading
The following sources informed this guide and are worth bookmarking if you’re going deeper on cap styles, embroidery technique, or team ordering logistics.
- Express Promo: A Complete Guide on Caps with Embroidery — Covers embroidery durability, cap styles, and promotional use cases in detail.
- Simply Merchandise: A Guide to Custom Embroidery on Caps — Strong on panel construction, logo placement, and why embroidery outperforms printing for branded programs.
- Sukaizen: Custom Embroidered Caps Buying Guide — The most technically detailed resource on technique selection, stitch specifications, and design rules for cap embroidery.
- Merchpath: Custom Hats for Teams Buyer’s Guide — Practical guidance on structured vs. unstructured caps, adjustable closures, and MOQ considerations for team orders.
- Jam4apparel: Why Businesses Order Custom Hats for Branding — Covers brand exposure, use-case examples, and how embroidered hats fit into a broader marketing program.
- Jam4apparel: Custom Embroidery Youth Sports Gear Guide — Directly relevant for coaches ordering team caps, with sizing and design guidance for youth programs.
Recommended
Ready to print your design?
Screen print, embroidery, and DTF — no minimums on many styles.