
Screen Printing Process Explained for Small Businesses
July 1, 2026
Screen Printing Process Explained for Small Businesses
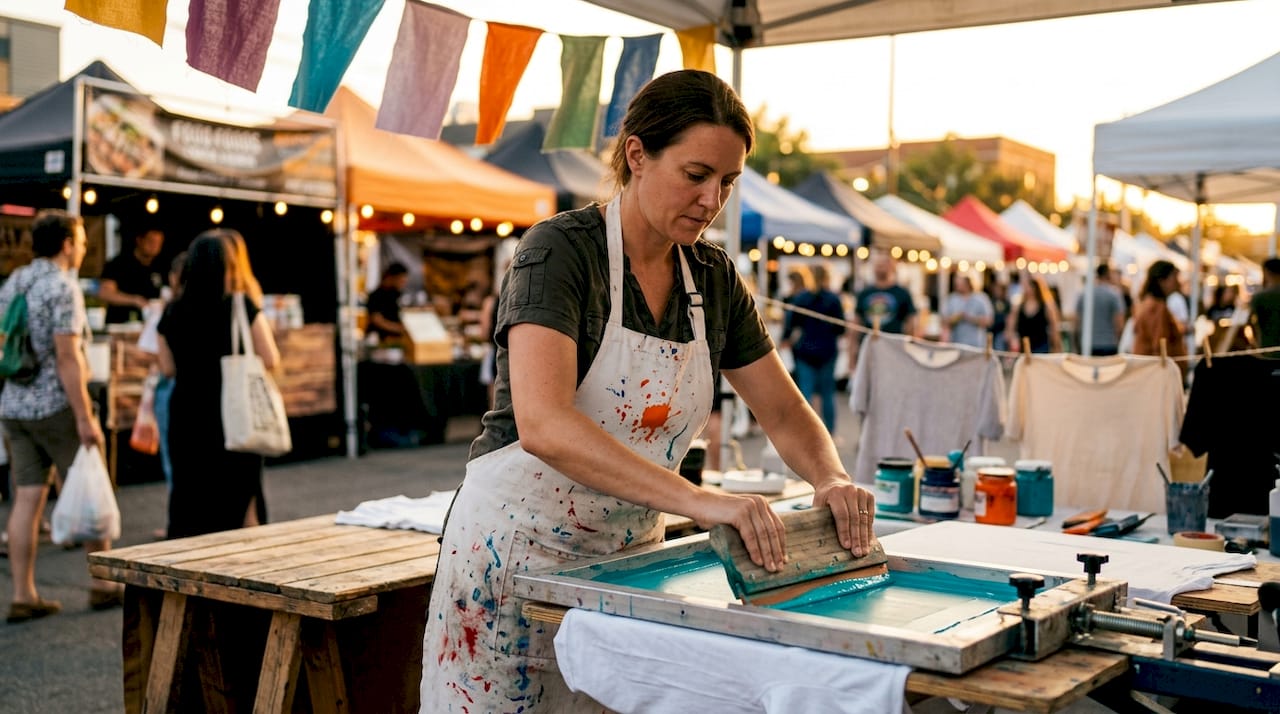
Screen printing is defined as the process of pushing ink through a mesh screen stencil onto a substrate, most commonly fabric, to produce sharp, durable designs for custom apparel. Known in the industry as serigraphy or silk screening, this method has been the standard for custom t-shirts, team uniforms, and branded merchandise for decades. The screen printing process explained here covers every stage, from design prep to final curing, so you can make informed decisions about techniques, costs, and whether to print in-house or work with a professional shop like Jam4apparel.
What are the main steps in the screen printing process?
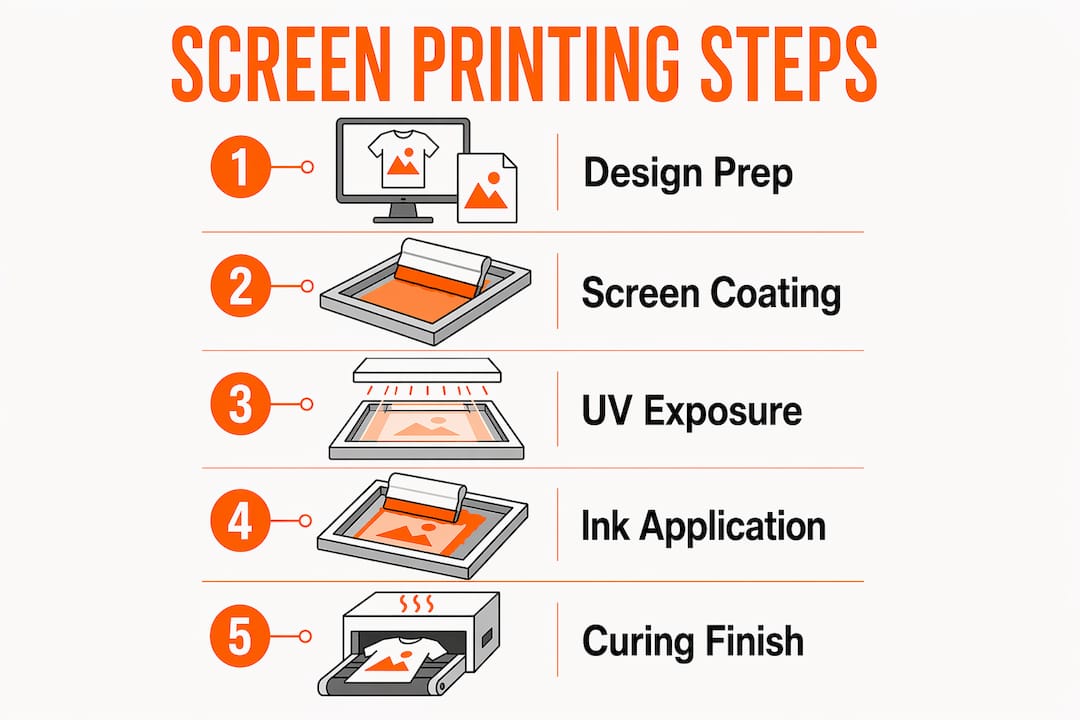
The screen printing workflow follows a fixed sequence. Each step builds on the last, and skipping or rushing any stage shows up in the final print.
-
Design preparation. Your artwork gets converted into a vector file and separated by color. Each color in the design requires its own screen, so a three-color logo means three separate screens. Color separation is where registration accuracy starts. A poorly separated file creates misaligned prints before ink ever touches fabric. For a deeper look at how color limits affect your design choices, the color limits designer’s guide from Jam4apparel breaks it down clearly.
-
Screen coating. A mesh screen gets coated with a light-sensitive emulsion. The emulsion thickness affects how much ink passes through, which directly influences print opacity and texture. Thicker emulsion deposits more ink, which works well for bold graphics but can obscure fine detail.
-
UV exposure. A transparent film of your design is placed on the coated screen and exposed to UV light. Emulsion coating and UV exposure harden the areas not covered by the design film. The unexposed areas wash out with water, leaving open mesh where ink will pass through.
-
Washing and stencil reveal. After exposure, the screen goes under water. The unexposed emulsion rinses away, and the design appears as open mesh openings. This is the stencil. The quality of this step determines edge sharpness in the final print.
-
Ink application. The screen is placed over the garment on a flat pallet. A squeegee pulls ink across the screen, forcing it through the open mesh onto the fabric below. Squeegee angles between 60 and 75 degrees and mesh counts from 100 to 300 are the industry standard parameters for controlling ink flow and print quality. The angle affects how much ink transfers per stroke.
-
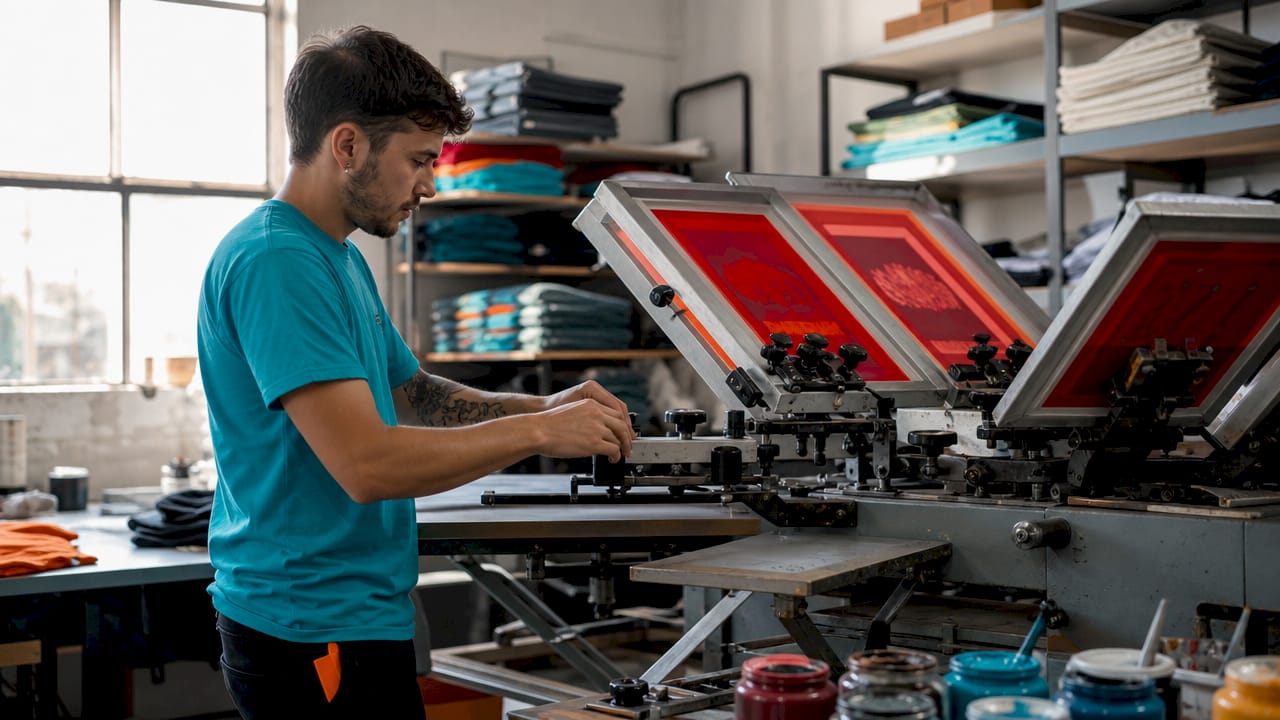
Multi-color registration. For designs with more than one color, each screen must align perfectly with the previous print. Registration marks on the screens guide this alignment. Even a small shift produces a blurry or misaligned result.
-
Curing. The printed garment passes through a conveyor dryer or sits under a heat press. Curing chemically bonds ink to the fabric fibers, making the print resistant to washing and fading. Without proper curing, prints fail fast.
Pro Tip: Fixture stability matters more than most people expect. An unstable pallet shifts the garment between color passes, ruining registration on multi-color runs. Clamp your pallet firmly before every print.
How do different inks and mesh types affect print quality?
The ink and mesh you choose shape everything about the finished product: how it feels, how long it lasts, and how well it handles fine detail.
Ink types: plastisol vs. water-based
Plastisol inks act like a durable paint layer on top of the fabric. They sit on the surface rather than soaking in, which produces vivid, opaque colors that hold up through heavy use. Plastisol is the most common choice for commercial apparel printing because it is forgiving to work with and does not dry in the screen. Water-based and discharge inks work differently. They penetrate the fabric fibers instead of coating them, producing a softer feel that many wearers prefer on lightweight shirts. The tradeoff is that water-based inks require more careful handling and can dry in the screen if left too long.
The choice between plastisol and water-based inks affects not just texture but also the wearer’s long-term experience. A plastisol print on a heavy cotton hoodie feels different from a water-based print on a tri-blend tee. Matching the ink to the garment type is a decision worth making before production starts.
Mesh count: detail vs. ink volume
- 100 mesh: Low count, thick ink deposit, best for bold graphics and specialty inks like glitter or metallic.
- 160 mesh: Mid-range, good balance of detail and ink coverage, the most common choice for standard apparel printing.
- 230 mesh: Higher count, finer detail, thinner ink layer, suited for halftone images and photographic prints.
- 300 mesh: Very fine, used for highly detailed artwork, minimal ink deposit, requires precise emulsion control.
Higher mesh counts yield fine detail but thinner ink layers. Lower counts give thicker ink deposits but sacrifice sharpness. Choosing the wrong mesh for your design is one of the most common technical mistakes in screen printing.
Pro Tip: Always match your ink type to your fabric before ordering screens. Printing plastisol on a 50/50 poly-cotton blend can cause dye migration, where the fabric’s dye bleeds into the ink and shifts the print color. Test on a sample garment first.
For a full breakdown of ink options and their applications, Jam4apparel’s guide on screen printing ink types covers the topic in detail.
What are the benefits and common applications of screen printing?
Screen printing produces some of the most vibrant, long-lasting prints available in custom apparel decoration. The ink sits with strong adhesion to the fabric, and when cured correctly at around 320°F for plastisol, the print survives hundreds of wash cycles without cracking or fading.
Key benefits of screen printing:
- Vivid, opaque colors that stand out on both light and dark garments.
- High durability when cured properly, making it ideal for workwear and team uniforms.
- Cost efficiency at mid-to-large order quantities, where setup costs spread across more units.
- Versatility across substrates: fabric, metal, plastic, wood, and glass all accept screen-printed ink.
- Consistent results across large runs, since each print uses the same screen and squeegee stroke.
Where screen printing fits vs. other methods:
| Criteria | Screen printing | Direct-to-garment (DTG) |
|---|---|---|
| Best order size | 24+ pieces | 1–12 pieces |
| Color vibrancy | Very high | Moderate to high |
| Print feel | Slightly raised (plastisol) or soft (water-based) | Soft, embedded |
| Setup cost | Higher per run | Minimal |
| Detail capability | High with correct mesh | Very high |
| Best for | Uniforms, bulk merch, team apparel | One-offs, photo prints |
Screen printing is the go-to method for sports teams, schools, nonprofits, and small businesses ordering branded shirts in volume. It also works well for promotional merchandise like tote bags, hats, and event shirts. When order quantities are small or designs require photographic detail across many colors, direct-to-garment or DTF printing becomes a better fit.
What are the cost factors and practical tips for ordering screen printing?
Screen printing carries upfront setup costs that make it less efficient for very small runs. Each color in a design requires a separate screen, and each screen costs time and money to prepare. That setup investment pays off quickly as order quantities grow, because the per-item printing cost drops fast once screens are ready.
Setup takes time but printing each garment is quick, which is why screen printing is ideal for larger orders. A run of 12 shirts carries a high cost per piece. A run of 100 shirts spreads that same setup cost across far more units, making the price per shirt much more competitive.
Practical tips before you place an order:
- Know your minimum quantities. Most professional shops set order minimums for screen printing. Jam4apparel’s guide on minimum order requirements helps small businesses understand what to expect and how to plan orders efficiently.
- Limit your color count. Every additional color adds a screen, which adds cost. Designs with one to three colors are the most cost-effective for screen printing.
- Verify curing equipment. If you are printing in-house, invest in a reliable conveyor dryer. Inadequate heat causes prints to fail within three to five wash cycles. A heat press works for small batches but is slower and less consistent than a conveyor dryer.
- Check registration before full runs. Print a test garment and inspect alignment under good lighting before running your full order.
- Avoid common ordering mistakes. Submitting low-resolution artwork, choosing the wrong garment color for your ink, and skipping size breakdowns are the most frequent errors. Jam4apparel’s resource on common ordering mistakes covers each one with clear solutions.
Understanding the custom clothing order workflow from artwork submission to production approval also helps you avoid delays and reprints.
Key Takeaways
Screen printing produces durable, vibrant custom apparel when each stage, from emulsion coating to curing at the correct temperature, is executed with precision.
| Point | Details |
|---|---|
| Process follows a fixed sequence | Design prep, screen coating, UV exposure, ink application, and curing must each be done correctly. |
| Ink choice shapes the result | Plastisol sits on fabric for vivid color; water-based inks penetrate fibers for a softer feel. |
| Mesh count controls detail | Higher mesh counts (230–300) give finer detail; lower counts (100–160) deposit more ink for bold graphics. |
| Curing is non-negotiable | Plastisol requires approximately 320°F to chemically bond to fabric and survive repeated washing. |
| Screen printing suits larger runs | Setup costs spread across more units, making it most cost-effective at 24 or more pieces. |
What I’ve learned about screen printing quality after years in the industry
The single biggest misconception I see from new customers and first-time printers is that better equipment automatically means better prints. It does not. Stable fixture setups affect print quality more than expensive machines, especially in multi-color runs. An unstable pallet causes registration errors that no amount of machine sophistication can fix. I have seen shops with entry-level equipment produce cleaner work than shops with high-end presses, simply because they took fixture stability seriously.
The second thing most people underestimate is curing. Printers obsess over ink color and mesh selection, then rush the curing step. A print that looks perfect off the press can fall apart after three washes if the ink never reached full cure temperature throughout the entire ink layer. Uniform heat across the whole print is what matters, not just surface temperature.
My honest advice for anyone starting out: focus on the fundamentals before worrying about specialty inks or complex multi-color designs. Get your emulsion coating consistent, your squeegee angle right, and your curing temperature dialed in. Those three things determine 80% of your print quality. Everything else is refinement.
— Adam
Jam4apparel’s custom screen printing services
Jam4apparel handles the entire screen printing process in-house at its Lake in the Hills, Illinois facility, which means faster turnaround and direct quality control at every stage.

From bulk t-shirts and hoodies to team uniforms and event shirts, Jam4apparel serves small businesses, schools, sports teams, and nonprofits throughout the Chicagoland area. The team works with you on artwork, color selection, and garment choice to get the print right the first time. Whether you need 24 pieces or several thousand, you can browse the full range of custom screen printing options or explore apparel solutions by industry at Jam4apparel’s industries page. Getting a quote is straightforward, and the team is available to answer questions before you commit to an order.
FAQ
What is screen printing in simple terms?
Screen printing is the process of pushing ink through a mesh stencil onto fabric or another surface to create a design. Each color in the design requires a separate screen.
How many colors can a screen print design have?
Screen printing can handle multiple colors, but each color requires its own screen and adds to setup cost. Designs with one to four colors are the most practical and cost-effective for most orders.
Why does curing matter so much in screen printing?
Curing chemically bonds the ink to the fabric fibers. Plastisol ink requires approximately 320°F to cure fully. Prints that do not reach full cure temperature crack or wash out within a few laundry cycles.
What mesh count should I use for a standard t-shirt print?
A 160-mesh screen is the most common choice for standard apparel printing. It balances ink coverage and detail well for most logo and text-based designs.
When is screen printing better than direct-to-garment printing?
Screen printing is more cost-effective for orders of 24 or more pieces and produces more vibrant, opaque colors on dark garments. Direct-to-garment printing is better suited for small runs or designs with photographic detail across many colors.
Recommended
- Custom Screen Printing | Bulk T-Shirts, Hoodies & Apparel | Jam 4 Apparel | Jam 4 Apparel
- Screen Printing Setup Fee: What Illinois Businesses Need to Know | Jam 4 Apparel
- What Is Screen Printing? Process, Uses, and Benefits | Jam 4 Apparel
- Custom Screen Printing Color Limits: Designer’s Guide | Jam 4 Apparel
Ready to print your design?
Screen print, embroidery, and DTF — no minimums on many styles.