
How to Make a T-Shirt at Home: DIY Printing & Sewing
August 5, 2026
How to Make a T-Shirt at Home: DIY Printing & Sewing
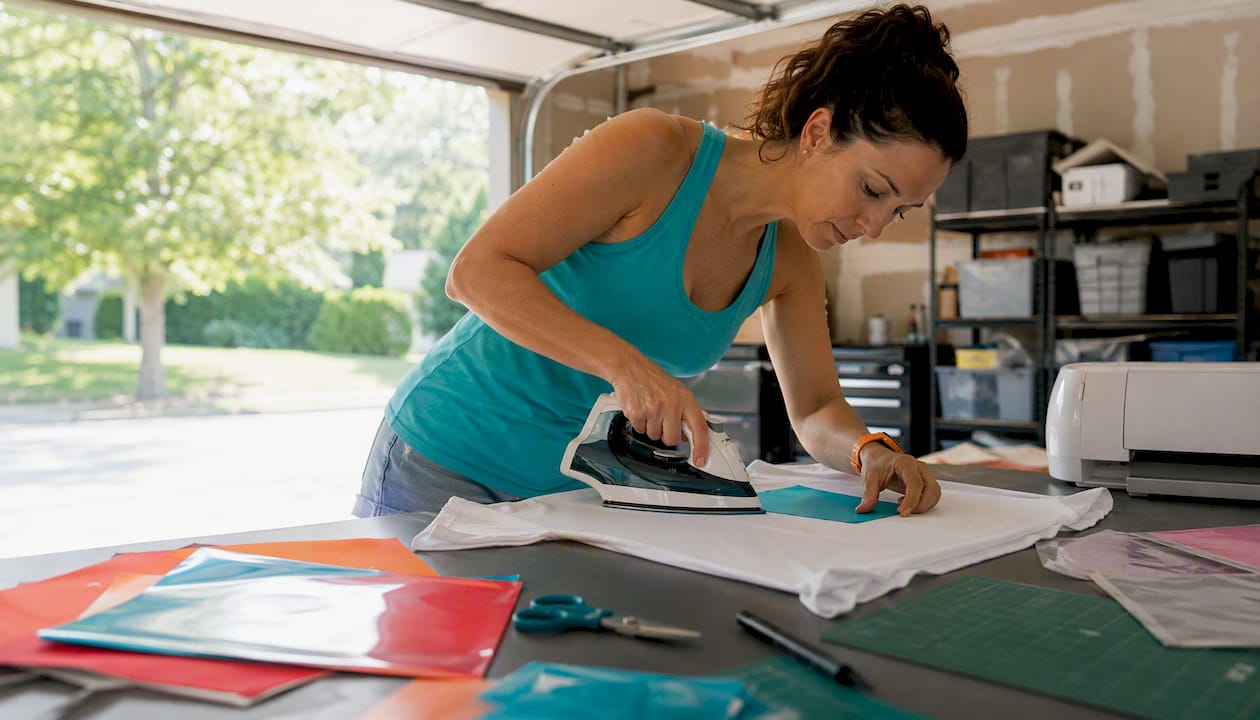
There are two practical ways to make a t-shirt at home: customize a blank tee using heat transfer vinyl (HTV), iron-on transfers, or Direct-to-Film (DTF) printing, or sew one from scratch using cotton jersey or another knit fabric. If you’re new to this, start with HTV. You’ll have a wearable shirt in under an hour, and the startup cost is low. Sewing from scratch is worth the effort if you want a custom fit or plan to build real garment-construction skills, but it takes longer and has a steeper learning curve.
Quick comparison to help you pick a path:
- Customize a blank (HTV/iron-on/DTF): Beginner-friendly, startup cost as low as the cost of an iron (or around $60–$100 for a basic heat press), 30–90 minutes per shirt, works on any blank tee
- Sew from scratch: Intermediate skill level, startup cost $100–$300+ depending on machine, several hours for beginners, depending on proficiency, produces a fully custom-fit garment
- Durability note: Inkjet transfers on light cotton survive roughly 25–40 wash cycles when applied correctly; dark-fabric transfers typically last 15–25 washes
For bulk orders, multi-color photo-quality prints, or tight deadlines, professional printing through a shop like Jam4apparel will outperform any home method on durability and cost per shirt.
Table of Contents
- Which method should you choose?
- What materials and tools do you actually need?
- How to make a t-shirt with HTV or transfer paper (step by step)
- Other ways to decorate a shirt at home
- How to sew a t-shirt from scratch (step by step)
- How much fabric, time, and money will this take?
- Troubleshooting, finishing, and care
- When to hire a pro: a quick checklist for ordering from Jam4apparel
- Key Takeaways
- Why start with HTV, and when to level up
- Useful sources and further reading
- Ready to skip the DIY and get professional results?
Which method should you choose?
The right choice depends on four things: your skill level, how many shirts you need, your budget, and how complex the design is.
| Dimension | Customize a Blank (HTV/Transfers/DTF) | Sew from Scratch |
|---|---|---|
| Best for | Quick one-offs, prototypes, gifts | Custom fit, special fabrics, sewists |
| Skill level | Beginner | Intermediate |
| Startup cost | startup cost ranging from low for an iron to around $60–$100 for an entry-level heat press | $100–$300+ (machine + serger optional) |
| Per-shirt cost | $5–$15 in materials | moderate per-shirt material cost for fabric and notions |
| Durability | durability range of multiple washes depending on the transfer type | Seams last years with proper finish |
| Ideal designs | Text, logos, simple graphics | Any — design lives in the fabric itself |
| Equipment | Iron or heat press, Cricut/Silhouette (for HTV) | Sewing machine, serger (optional), twin needle |
Choose HTV or iron-on transfers if you want fast results, you’re making one to five shirts, or you’re testing a design before committing to a bulk order.
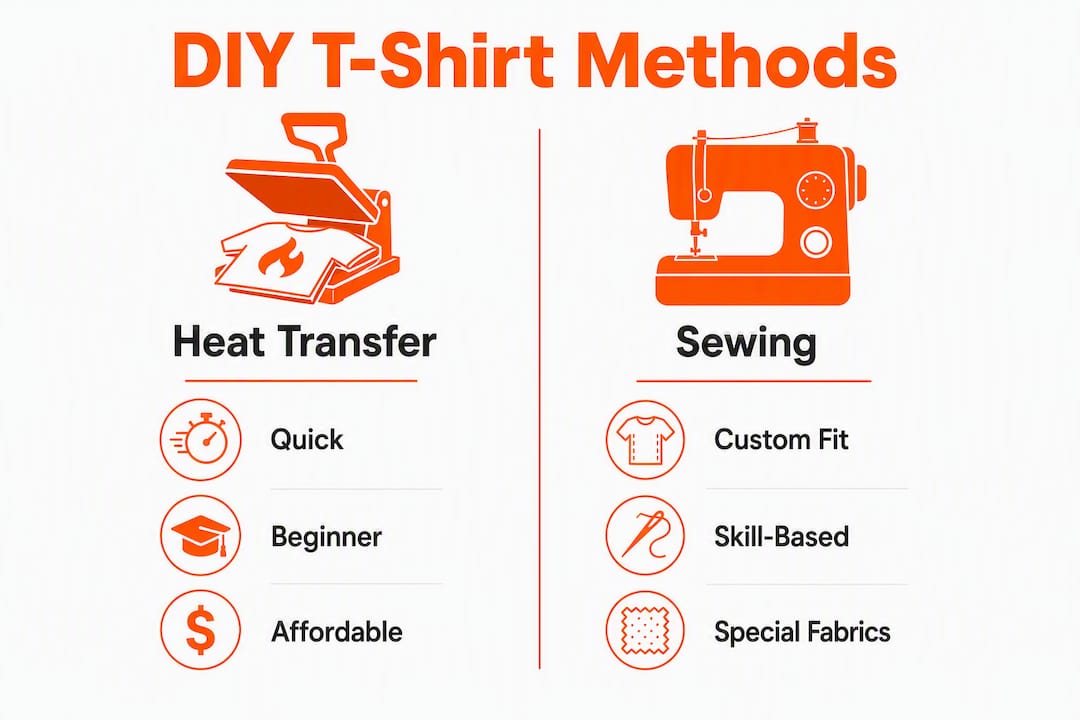
Choose sewing if you need a specific fit, you’re working with specialty fabric, or you want to develop a skill that scales into garment construction.
Choose professional printing when you need more than 20 shirts, your design has photographic detail or more than three colors, or you’re on a deadline. Screen printing drops per-unit cost significantly at volume, and DTF transfers handle multi-color designs on virtually any fabric without the setup cost of screens. Jam4apparel handles both in-house.
Pro Tip: Before committing to a full run, make one test shirt. A single HTV sample costs almost nothing and tells you whether your design reads well at actual size.
What materials and tools do you actually need?
For customizing a blank tee
- Blank t-shirts (100% cotton for HTV and inkjet transfers; polyester blends for sublimation)
- Heat transfer vinyl (HTV) OR inkjet transfer paper (light or dark fabric versions)
- Cricut Explore, Cricut Maker, or Silhouette Cameo cutting machine (for HTV with detailed designs)
- Heat press (a moderate startup cost for HTV with an entry-level heat press entry-level clamshell) or household iron (no steam)
- Weeding tools (hook and tweezers)
- Parchment paper or a Teflon sheet (protects the transfer and the press platen)
- Inkjet printer if using transfer paper
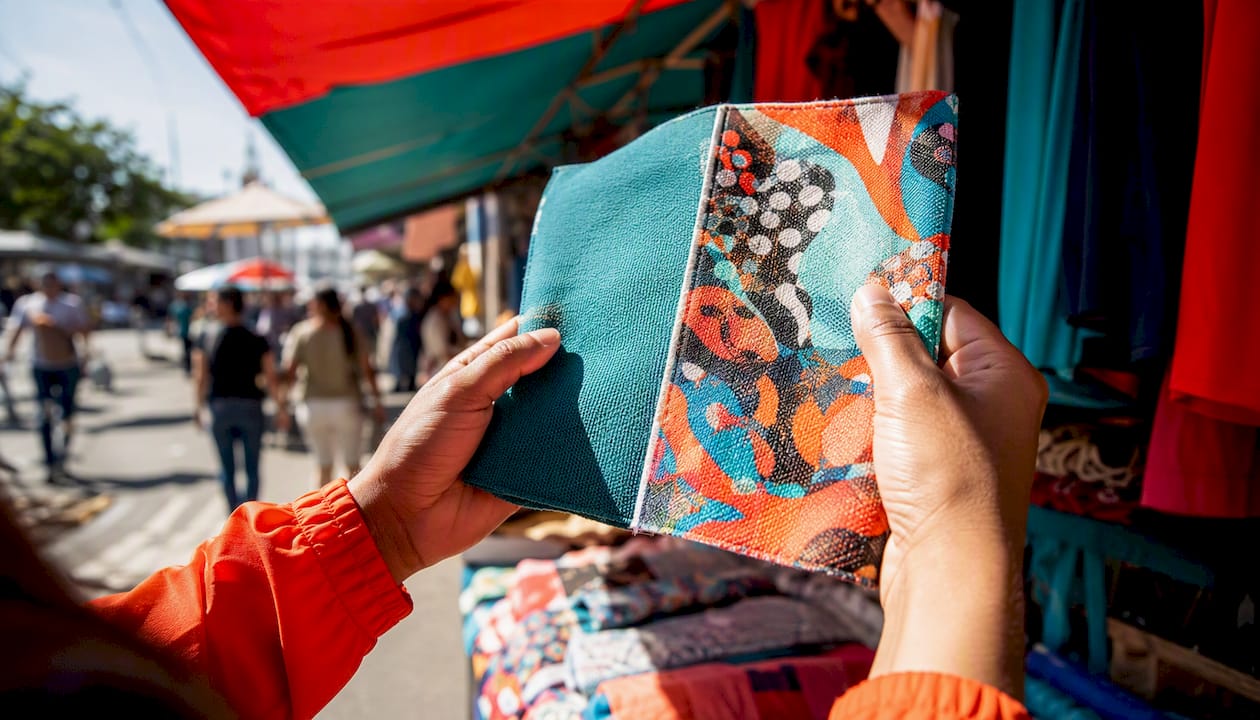
Fabric choice affects print quality more than most beginners expect. Cotton absorbs HTV adhesive cleanly; polyester can cause color migration with heat. Stick to 100% cotton blanks until you know your materials.
For sewing from scratch
- Cotton jersey (the most forgiving knit for beginners), interlock, or rib knit for neckbands
- A t-shirt sewing pattern in your size
- Ballpoint or jersey sewing needles (sizes 75/11 or 90/14)
- Twin needle for hems
- Serger/overlocker (optional but produces cleaner seam finishes)
- Sewing machine with a stretch stitch or narrow zigzag
- Wonder Tape (water-soluble, double-sided tape for neckband placement)
- Rotary cutter, cutting mat, and fabric clips
Fabric yardage guide
| Adult Size | — | Neckband allowance |
|---|---|---|
| Small | suitable amount of fabric for a small adult size | 1/4 yard |
| Medium | suitable amount of fabric for a medium adult size | 1/4 yard |
| Large | suitable amount of fabric for a large adult size | 1/4 yard |
| XL | a suitable amount of fabric for an extra-large adult size | 1/4 yard |
These are working estimates. Always add 10% for cutting errors, especially on your first project.
Pro Tip: Buy an extra half yard of the same fabric for practice cuts and test seams. Knit fabric behaves differently from woven, and a few practice passes on scraps before cutting your pattern pieces saves a lot of frustration.
How to make a t-shirt with HTV or transfer paper (step by step)
This is the fastest path to a finished shirt. The full process runs design → cut or print → prep the shirt → press → finish.
-
Create or finalize your artwork. Export at 300 DPI in RGB color mode; inkjet printers handle the RGB-to-CMYK conversion internally. Keep the design within a 10"–12" wide print area for a standard chest placement.
-
Mirror your image (HTV only). HTV is cut face-down on the carrier sheet, so the design must be flipped horizontally before cutting. Inkjet transfer paper for light fabrics also requires mirroring; dark-fabric paper does not.
-
Cut and weed (HTV). Load HTV shiny-side down in your Cricut or Silhouette cutter. After cutting, weed away all the negative vinyl using your hook tool. Leave only the design on the carrier sheet.
-
Print (transfer paper). Set your printer driver to “Photo Paper” or a premium media setting to maximize ink density. Let the print dry fully — at least 2 minutes — before handling.
-
Pre-press the garment. Place the blank shirt on your heat press or ironing board and press for 5 seconds at transfer temperature. This removes moisture and wrinkles, which are the two most common causes of peeling transfers.
-
Position and press. Center the design, carrier sheet facing up. For most HTV and transfer paper, press at around 375°F (190°C) for 10–15 seconds with firm, even pressure. Check your specific material’s instructions — times vary.
-
Peel. Follow the manufacturer’s peel instructions. Hot-peel vinyl comes off immediately; cold-peel requires the transfer to cool completely before you remove the carrier. Rushing a cold-peel is the fastest way to lift the design.
-
Re-press if needed. Lay a parchment sheet over the finished design and press for 5 more seconds to seal edges.
-
Wait before washing. Let the shirt sit for 24 hours before the first wash. When you do wash it, turn it inside out, use cold water, and run a gentle cycle.
Pro Tip: If a corner lifts after pressing, don’t peel the whole transfer. Lay the parchment sheet back over it and press that corner for 5–8 seconds. Catching it early almost always fixes it.
Troubleshooting quick reference:
- Peeling edges: Insufficient pressure or temperature. Re-press with firmer contact.
- Cracking HTV: Over-pressed or wrong temperature. Reduce heat by 10°F and test on a scrap.
- Faded print after washing: Transfer paper was applied to a polyester blend. Switch to 100% cotton.
Other ways to decorate a shirt at home
HTV and iron-on transfers aren’t your only options. Here’s how the other main methods stack up.
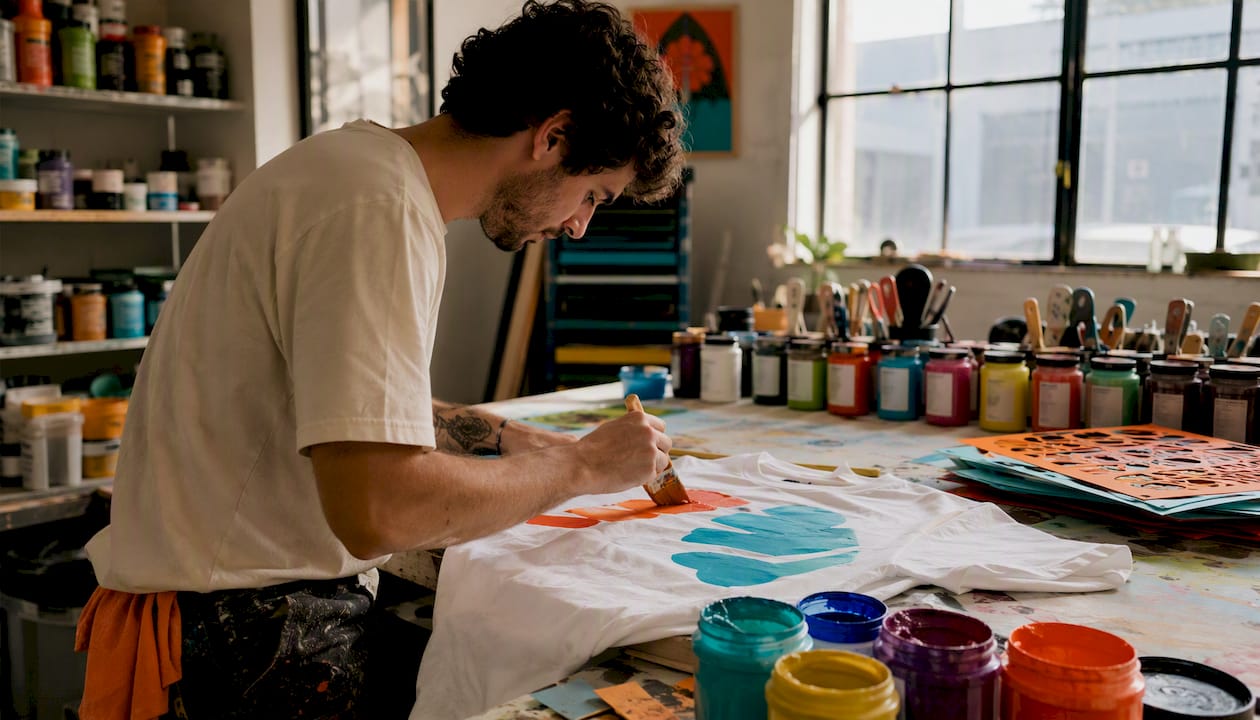
Screen printing produces sharp, opaque color on cotton and is the most cost-effective method once you’re printing 24+ shirts. The setup involves burning a separate screen for each color, so it’s not practical for one-offs. At home, a basic screen-printing kit works for simple, single-color designs. For multi-color or detailed work, the screen-printing process is better handled by a shop with proper exposure equipment.
Direct-to-Film (DTF) prints a full-color design onto a special film, which is then heat-pressed onto the garment. It works on cotton, polyester, blends, and even nylon. DTF is excellent for multi-color designs without the per-color screen cost, and the transfers are durable. Home DTF printers exist but cost $500–$2,000+, making it a pro-shop method for most people.
Direct-to-Garment (DTG) prints ink directly onto the fabric like a large inkjet printer. DTG delivers photo-quality results on 100% cotton and requires no transfer step, but the machines start at several thousand dollars. It’s the right call for one-off photo prints ordered through a print shop.
Sublimation bonds dye into the fabric at the molecular level, producing vibrant, all-over prints that won’t crack or peel. The catch: it only works on polyester or polyester-coated substrates. On a 100% cotton shirt, sublimation ink will wash out within a few cycles.
Fabric painting, tie-dye, and bleach designs are genuinely beginner-friendly alternatives that need no heat equipment at all. Tie-dye with fiber-reactive dyes on 100% cotton produces wash-fast color. Bleach discharge (applying diluted bleach to a dark shirt with a brush or stencil) creates a faded, vintage look. These methods are low-cost, low-tech, and forgiving for first-timers.
For a deeper look at how these methods compare on durability and cost, the apparel decoration methods guide breaks down each option by use case.
How to sew a t-shirt from scratch (step by step)
Sewing a tee follows this sequence: pattern prep → cutting → shoulder seams → neckband → sleeves → side seams → hems → final press. Skill level: Intermediate.
-
Choose your knit. Cotton jersey is the standard choice: it stretches in one direction, recovers well, and is easy to sew. Interlock is thicker and more stable, good for structured tees. Rib knit stretches in both directions and is ideal for neckbands and cuffs.
-
Trace and adjust your pattern. Trace the pattern pieces onto paper rather than cutting the original. Compare the pattern’s finished measurements to your body measurements and adjust side seams or length before cutting fabric.
-
Cut accurately. Use a rotary cutter on a single layer of fabric rather than folding the fabric and cutting two layers at once. Knit fabric shifts when folded, and a single-layer cut keeps your pieces accurate. Use pattern weights instead of pins to hold pieces flat.
-
Sew shoulder seams. Join front and back at the shoulders. Stabilize these seams with clear elastic or a strip of interfacing sewn into the seam allowance. Shoulder seams bear the weight of the garment; an unstabilized shoulder will stretch out of shape after a few wears.
-
Attach the neckband. Cut a rib knit neckband strip slightly shorter than the neckline circumference (about 90% of the measurement) so it sits flat when stretched around the neck. Use Wonder Tape to hold the neckband in position before sewing. The tape disappears in the wash and prevents the neckband from stretching as you sew.
-
Set the sleeves. Attach sleeves flat before closing the side seams. This is easier than sewing a sleeve into a closed armhole and produces a cleaner result on knits.
-
Sew side seams. Close the side seams from underarm to hem in one continuous seam. Use a serger for a clean, stretch-friendly finish, or a narrow zigzag stitch (1.5mm wide, 2.5mm long) on a standard machine.
-
Hem sleeves and body. Fold up the hem allowance and press lightly. Sew with a twin needle, which creates two parallel rows of stitching on the right side and a zigzag on the wrong side — exactly what a store-bought tee looks like. Set machine tension slightly looser than normal to prevent the hem from puckering.
-
Final press. Press seams lightly from the wrong side using a pressing cloth. Avoid pressing directly on the right side of jersey; the heat can flatten the fabric’s texture.
Pro Tip: Sew a test neckband on a fabric scrap before touching your actual shirt. Neckband tension is the single skill that separates a professional-looking tee from a homemade one. Two or three practice rounds on scraps is not wasted time.
Common mistakes to avoid:
- Wavy neckband: The neckband strip was cut too long. Measure carefully and cut it to 90% of the neckline circumference.
- Stretched sleeves: You pulled the fabric while sewing. Let the machine feed the fabric; guide it, don’t push or pull.
- Puckered hems: Tension is too tight or the needle is wrong. Switch to a ballpoint needle and reduce upper tension slightly.
How much fabric, time, and money will this take?
Time estimates by method
- HTV one-off: a typical time frame under two hours from design to finished shirt
- Inkjet transfer: about an hour including print drying
- Sewing a tee (beginner): 2–4 hours, including cutting and pressing
- Screen printing a small batch (6–12 shirts): a few hours setup plus additional time per color for each print run
- DTF (home kit): around an hour per transfer after file preparation
Cost examples
| Method | Startup cost | Per-shirt material cost |
|---|---|---|
| HTV with iron | lower startup cost for HTV with an iron | $3–$8 |
| HTV with entry heat press | startup cost around $60–$100 for an entry-level heat press | $3–$8 |
| Inkjet transfer paper | — | lower per-shirt cost for inkjet transfer paper |
| Sewing from scratch | higher startup cost for sewing machines | moderate per-shirt material cost for sewing from scratch |
| Pro screen printing (bulk) | — | lower per-shirt cost for professional screen printing at higher volume |
A few practical rules of thumb:
- If you’re making 1–5 shirts, HTV or transfer paper beats every other method on total cost.
- Once you hit 10–20 shirts, the per-shirt cost of DIY materials often equals or exceeds a professional quote, especially when you factor in your time.
- At 24+ shirts, bulk screen printing drops per-unit cost enough that ordering professionally is almost always the smarter financial decision.
The economics of bulk ordering shift quickly once you account for your own labor. A 2-hour HTV session for 10 shirts at $8 each in materials is $80 plus your time. A professional quote for the same run might come in at $6–$8 per shirt with no labor from you.
Troubleshooting, finishing, and care
Common problems and fixes
- Transfer peeling at edges: Re-press with a parchment sheet, firm pressure, and an extra 5 seconds. Edges peel when pressure is uneven.
- HTV cracking after washing: Usually caused by over-pressing. Drop the temperature 10–15°F and test on a scrap before re-pressing the shirt.
- Puckered hem on a sewn tee: Loosen upper tension and switch to a ballpoint needle. If the problem persists, try a longer stitch length.
- Stretched neckline: The neckband was sewn with too much tension or the fabric was pulled during stitching. Press the neckline flat with steam and re-topstitch if needed.
Washing and care
- Wash inside out in cold water on a gentle cycle.
- Tumble dry on low heat or hang dry. High heat degrades both HTV adhesion and knit fabric elasticity.
- Avoid bleach on printed shirts; it breaks down transfer adhesives and dyes.
- Wait 24 hours after pressing before the first wash. The adhesive needs time to fully cure.
Pro Tip: Pre-pressing the garment before applying any transfer is the single most effective thing you can do to extend wash life. Five seconds at temperature removes moisture that would otherwise cause the adhesive to bond unevenly.
Safety notes
Heat presses reach 375°F+. Keep a stable, heat-resistant work surface, never leave the press unattended while hot, and use the Teflon sheet as a barrier between the platen and your hands when repositioning transfers. Sergers run at high speed with exposed blades; always use the presser foot guard and keep fingers clear of the needle area.
When to hire a pro: a quick checklist for ordering from Jam4apparel
DIY makes sense for one-offs, prototypes, and personal projects. A professional shop is the better call when:
- You need 20+ shirts
- Your design has more than two colors or includes photographic detail
- You’re working with a fabric type (performance wear, blends, nylon) that doesn’t play well with home heat transfers
- You have a hard delivery deadline
- You want embroidery, custom patches, or relabeling alongside printing
Vendor brief checklist (copy this into your quote request)
- Quantity and size breakdown (S/M/L/XL/2XL)
- Fabric type or preferred blank brand
- Number of print locations (front, back, sleeve)
- Artwork file type (vector .AI or .EPS preferred; 300 DPI .PNG accepted)
- Preferred decoration method (screen printing, DTF, embroidery)
- Target delivery date
Pro Tip: Send a vector file if you have one. Screen printing and DTF both produce sharper results from vector artwork, and it eliminates back-and-forth over resolution.
Jam4apparel offers in-house screen printing, DTF transfers, and embroidery with fast turnaround out of Lake in the Hills, Illinois. They provide a free design proof before production and handle orders from small runs to thousands of pieces. For bulk event shirts, custom event apparel is a good starting point. For DTF specifically, their DTF printing service covers multi-color designs with no minimum order.
Key Takeaways
For most people, HTV is the fastest and cheapest way to make a custom t-shirt at home; sewing from scratch delivers a better fit but requires more skill, time, and equipment.
| Point | Details |
|---|---|
| Start with HTV for quick results | HTV on a blank tee costs $3–$8 per shirt in materials and takes under 90 minutes — and if you upgrade to a heat press, the entry-level machines start around $60–$100. |
| Pre-press every garment | Five seconds at transfer temperature removes moisture and prevents peeling. |
| Sew with the right needle and stitch | Use a ballpoint needle and stretch or narrow zigzag stitch to prevent skipped stitches on knit fabric. |
| Know when DIY stops making sense | At 20+ shirts, professional printing often costs less per shirt than DIY materials plus your time. |
| Jam4apparel for bulk or pro-grade work | Jam4apparel handles screen printing, DTF, and embroidery in-house with fast turnaround and no minimum on DTF orders. |
Why start with HTV, and when to level up
HTV earns its reputation as the beginner’s entry point for one simple reason: the feedback loop is fast. You design something, press it, and know within an hour whether it works. That speed matters when you’re learning, because you can iterate without losing a full afternoon.
The jump to sewing knits is a different kind of commitment. Knit fabric doesn’t behave like woven cotton, and the techniques that make a tee look professional — a stable neckband, a twin-needle hem, a shoulder seam that doesn’t stretch out — each take deliberate practice. None of it is beyond a motivated beginner, but expecting to nail it on the first shirt sets you up for frustration.
The progression that actually works: start with HTV to get comfortable with design sizing, placement, and heat application. Once you’ve made five or ten shirts and understand how designs translate from screen to fabric, the investment in a sewing machine and a serger starts to make sense. At that point, you’re not just making shirts; you’re building a skill set that can scale into a small business or a serious creative practice.
The equipment threshold matters too. A household iron gets you started, but a dedicated heat press removes the two biggest variables in transfer quality: temperature accuracy and pressure uniformity. That upgrade alone makes a measurable difference in how long transfers last through washing. Similarly, a serger isn’t required to sew a t-shirt, but it produces seam finishes that a zigzag stitch on a standard machine can’t fully replicate.
For anyone who reaches the point where DIY volume stops making sense, the gap between a home setup and a professional shop is significant. Screen printing, DTF, and embroidery at scale require equipment, calibration, and material knowledge that takes years to develop. Knowing when to hand that off is part of the skill.
Useful sources and further reading
Before pressing any transfer, always check the manufacturer’s recommended temperature, time, and pressure settings. These vary by material and override any general guideline in this article.
- How to Sew a Fitted T-Shirt from Start to Finish — Seamwork
- How to make a t-shirt — Sartor Bohemia
- Step by Step T-Shirt Design for Creators and Brands — 3 Wizard Clothing
Ready to skip the DIY and get professional results?
When your project outgrows a household iron or a home sewing machine, Jam4apparel is the direct alternative: in-house screen printing, DTF transfers, and embroidery produced at their Lake in the Hills, Illinois facility, with no outsourcing and no minimum order on DTF.
The practical advantage over DIY at volume is straightforward. You get consistent color, professional seam quality on blanks, and a free design proof before a single shirt is printed. Jam4apparel works with small businesses, schools, sports teams, and event organizers across the Chicagoland area, handling everything from a dozen spirit wear shirts to thousands of branded pieces.
If you’re ordering for an event, their event t-shirt service covers the full process. For multi-color or photo-quality designs, their DTF printing service handles complex artwork on virtually any fabric. For bulk screen-printed runs, get a quote at Jam4apparel.com and include the vendor brief checklist from the section above.
Recommended
Ready to print your design?
Screen print, embroidery, and DTF — no minimums on many styles.