
Flash Curing Explained: Screen Printing's Key Step
July 10, 2026
Flash Curing Explained: Screen Printing’s Key Step
Flash curing is defined as the process of briefly heating a printed ink layer to a gel state, making it tack-free so additional colors can print on top without blending or smearing. In the flash curing explained screen printing world, this step sits between color passes in multi-layer workflows and separates professional results from amateur ones. Plastisol ink, the most common ink in commercial screen printing, requires this intermediate heat treatment to hold its position on the garment. Without it, wet ink layers mix on contact, destroying color definition and wasting entire print runs.
How does flash curing work in multi-color screen printing?
Flash curing raises ink temperature to approximately 220°F (105°C), which gels the ink without fully curing it. At that temperature, the ink surface becomes slightly tacky, similar to the back of a sticky note. That tackiness is the goal. It holds the garment in place on the platen and gives the next ink layer a surface to bond to without the colors bleeding together.
The process is most critical in two situations. First, when printing multiple colors on dark garments where an underbase layer of white ink must be set before top colors go down. Second, when running wet-on-wet printing, where speed demands that each layer be stabilized before the next screen drops. Flash curing is primarily used in multi-color designs and underbase prints on dark garments, not for simple single-color jobs.
Getting the gel state right matters as much as reaching the temperature. Under-flashing leaves ink wet enough to smear under the next squeegee pass, ruining registration and color clarity. Over-flashing hardens the base layer too much, preventing top layers from adhering properly, which causes peeling or the top color sliding off entirely.
- Under-flashing: Ink remains wet, smears under squeegee pressure, bleeds into adjacent colors
- Over-flashing: Base layer hardens, top colors fail to bond, peeling appears after washing
- Correct flash: Ink surface is tack-free but pliable, top colors adhere cleanly
Pro Tip: Touch the flashed ink lightly with your knuckle, not your fingertip. If it feels warm and doesn’t transfer to your skin, the gel state is correct. Fingertip oils can contaminate the ink surface and cause adhesion problems.
What types of flash curing equipment should you use?
Two main flash unit technologies dominate the market: quartz and infrared (IR), sometimes called cal-rod units. Each has a distinct operating profile that suits different shop environments.
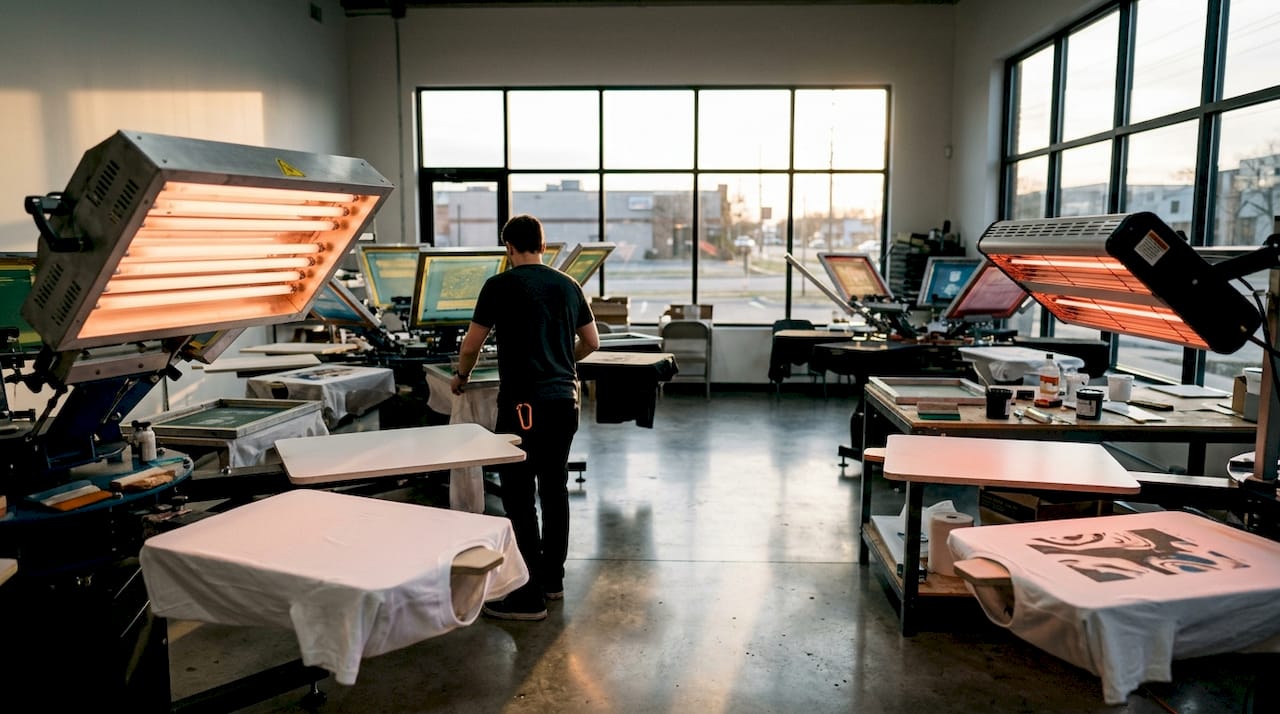
Quartz flash units offer instant on/off responsiveness, making them the preferred choice in high-speed automatic press environments. They reach operating temperature almost immediately, which reduces dwell time and protects heat-sensitive fabrics like polyester from scorching. IR cal-rod units take longer to heat up and cool down, but they are durable, affordable, and well-suited to manual shops with lower production volumes. The slower heat curve of cal-rod units actually gives operators more margin for error on thicker garments.
Distance from the flash unit to the platen critically influences heat intensity. Move the unit too close and you risk scorching the fabric or over-flashing the ink. Move it too far and the ink never reaches gel temperature within the allotted time. Most operators start at 3–4 inches above the platen and adjust based on test prints.
Choosing between manual and automatic setups
Manual shops with one or two press stations benefit from a single flash unit positioned between print heads. Automatic presses running high-volume orders need a flash unit integrated into the press rotation, often with programmable dwell times. Budget matters here. Entry-level IR units cost significantly less than quartz units, but quartz units pay back in speed and fabric protection over time on automatic lines.
Pro Tip: Always test your flash unit on a scrap garment before starting a production run. Fabric weight, color, and fiber content all affect how quickly heat transfers through the material. A black 100% cotton tee absorbs heat differently than a gray 50/50 polyester blend.
Controlling flash variables like distance, time, and temperature is the single biggest factor in balancing production speed with print quality. Shops that skip this calibration step produce inconsistent results across a run.
Best practices for flash curing: timing, temperature, and technique
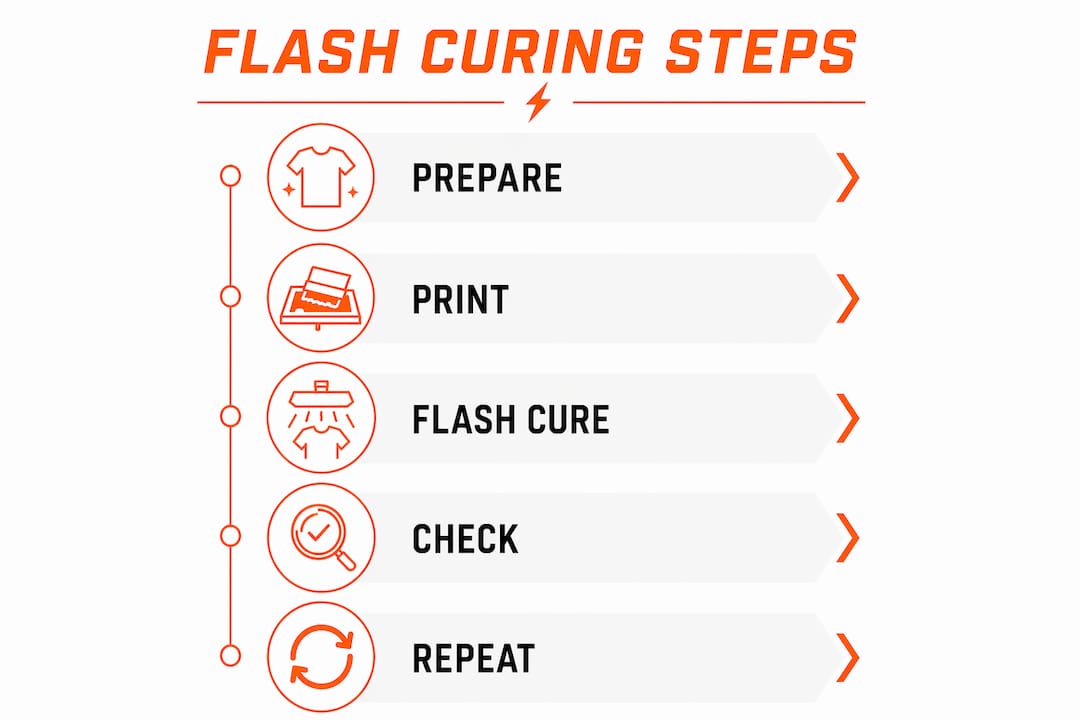
Achieving a tack-free gel state consistently requires controlling three variables: temperature, time, and distance. Here is the workflow that produces reliable results across garment types.
- Set your flash unit distance to 3–4 inches above the platen as a starting point.
- Run a test flash on a scrap garment for 3–5 seconds and check the ink surface with the knuckle test.
- Measure surface temperature with an infrared thermometer to confirm the ink surface is near 220°F (105°C).
- Adjust dwell time up or down in one-second increments until the ink is tack-free but not hardened.
- Check adhesion by pressing a piece of tape to the flashed ink and pulling it off. Clean removal means correct gel state.
- Document your settings for each ink and garment combination so you can repeat results on future runs.
Note that an infrared thermometer measures surface temperature only. It does not confirm heat penetration through the full ink layer. For flash curing, surface temperature is sufficient because you are only gelling the top of the ink, not curing through it. Full cure requires a different approach entirely.
Several variables shift your ideal flash settings:
- Ink thickness: Thicker deposits need longer flash times to gel fully at the surface.
- Garment color: Dark garments absorb heat faster, which can reduce required dwell time.
- Fiber content: Polyester blends are heat-sensitive and require lower flash temperatures or greater unit distance.
- Ink formulation: High-opacity white inks and specialty inks like metallics behave differently from standard plastisol.
Pro Tip: Use temperature strips on your first garment of each run. They give you a quick visual confirmation that the ink surface hit the target range without requiring you to stop and measure with a thermometer every time.
Flash dryers must be calibrated to the specific garment and ink combination in use. A setting that works perfectly on a heavyweight cotton hoodie will over-flash a lightweight polyester jersey.
What is the difference between flash curing and full curing?
Flash curing and full curing are not interchangeable steps. They serve completely different purposes in the print workflow, and skipping or confusing them causes print failures that show up in the wash.
Flash curing gels the ink surface to a tack-free state at around 220°F (105°C). Full curing permanently polymerizes the entire ink layer by raising it to 320°F (160°C) and holding it there for 15–20 seconds. That dwell time at fusion temperature is what creates wash durability. A print that has only been flash cured will crack, peel, or wash out after a few laundry cycles.
| Step | Temperature | Purpose | Equipment |
|---|---|---|---|
| Flash curing | ~220°F (105°C) | Gel ink surface for layering | Flash dryer unit |
| Full curing | 320°F (160°C) | Polymerize ink for durability | Conveyor dryer |
| Dwell time | N/A for flash | 15–20 sec at fusion temp | Conveyor dryer |
Final curing must be performed in a conveyor dryer where the ink reaches fusion temperature for sufficient dwell time. A flash unit cannot substitute for a conveyor dryer because it delivers short bursts of heat, not sustained temperature across the full ink thickness. Shops that try to use a flash unit as a final cure step produce prints that feel cured but fail within a few washes.
Curing is not complete once ink feels dry. Plastisol requires full polymerization through heat to achieve wash durability. That distinction is the most common source of print failures in shops that are new to plastisol workflows. The correct production sequence is: print base layer, flash cure, print top colors, then send the finished garment through the conveyor dryer for full cure. Every step depends on the one before it.
Understanding common curing errors in apparel printing helps you catch problems before they reach the customer. Most washout failures trace back to either skipping the full cure step or running the conveyor dryer too fast for the ink deposit thickness.
Key Takeaways
Flash curing gels ink to a tack-free state at 220°F (105°C) to enable multi-layer printing, but full curing at 320°F (160°C) with sufficient dwell time is the only step that creates wash-durable prints.
| Point | Details |
|---|---|
| Flash curing temperature | Heat ink to ~220°F (105°C) to gel the surface without fully curing. |
| Full cure requirement | Reach 320°F (160°C) and hold for 15–20 seconds in a conveyor dryer. |
| Equipment choice | Quartz units suit high-speed automatic presses; IR cal-rod units fit manual shops. |
| Over-flashing risk | Hardened base layers prevent top color adhesion, causing peeling after washing. |
| Calibrate per job | Adjust flash distance, time, and temperature for each ink, garment, and fiber type. |
What I’ve learned from watching shops get flash curing wrong
The most common mistake I see is treating flash curing as a shortcut to full curing. Operators run a garment under the flash unit, feel that the ink is dry, and send it straight to the customer. Three washes later, the print is cracking or peeling, and the shop is reprinting the order at their own cost.
The second mistake is running the same flash settings across every job. A shop that dials in settings for a heavyweight cotton tee and then runs those same settings on a 100% polyester jersey will scorch fabric or under-flash the ink. Neither outcome is acceptable in a professional run.
What actually works is treating flash curing as a calibration exercise at the start of every job. Spend five minutes on test prints, confirm your gel state, document the settings, and then run the job with confidence. That five minutes saves hours of reprints and customer complaints.
The shops that produce the most consistent multi-color work on dark garments are the ones that understand flash curing as a precision step, not a convenience step. They know their equipment, they know their inks, and they test before they run. That discipline is what separates reliable production from guesswork.
— Adam
Jam4apparel’s approach to professional screen printing
Jam4apparel applies calibrated flash curing techniques to every multi-color and dark garment order that comes through the shop in Lake in the Hills, Illinois. The result is sharp color separation, clean underbase printing, and prints that hold up through repeated washing.

Whether you need bulk custom screen printing for a team, a school, or a growing brand, Jam4apparel’s in-house production handles the full workflow from underbase to final cure. Every order goes through a conveyor dryer for a complete cure, not just a flash. Explore custom screen printing services built for professional results, or browse apparel options by industry to find the right fit for your organization.
FAQ
What temperature does flash curing reach?
Flash curing heats plastisol ink to approximately 220°F (105°C), which gels the surface to a tack-free state without fully curing the ink layer.
Is flash curing the same as full curing?
No. Flash curing only gels the ink surface for layering. Full curing requires reaching 320°F (160°C) and holding that temperature for 15–20 seconds in a conveyor dryer to achieve wash durability.
When do you need to flash cure a screen print?
Flash curing is needed for multi-color designs and underbase prints on dark garments. Single-color prints on light garments typically go straight to the conveyor dryer without a flash step.
What happens if you over-flash the ink?
Over-flashing hardens the base ink layer, which prevents top colors from bonding properly. The result is peeling or top colors sliding off, often visible after the first wash.
Can you use an infrared thermometer to confirm a full cure?
An infrared thermometer measures surface temperature only and does not confirm heat penetration through the full ink thickness. Full cure depends on both temperature and dwell time, which is why a conveyor dryer is required for final curing.
Recommended
Ready to print your design?
Screen print, embroidery, and DTF — no minimums on many styles.