Custom Patch for Business Jacket: What to Order and Why
August 17, 2026
Custom Patch for Business Jacket: What to Order and Why
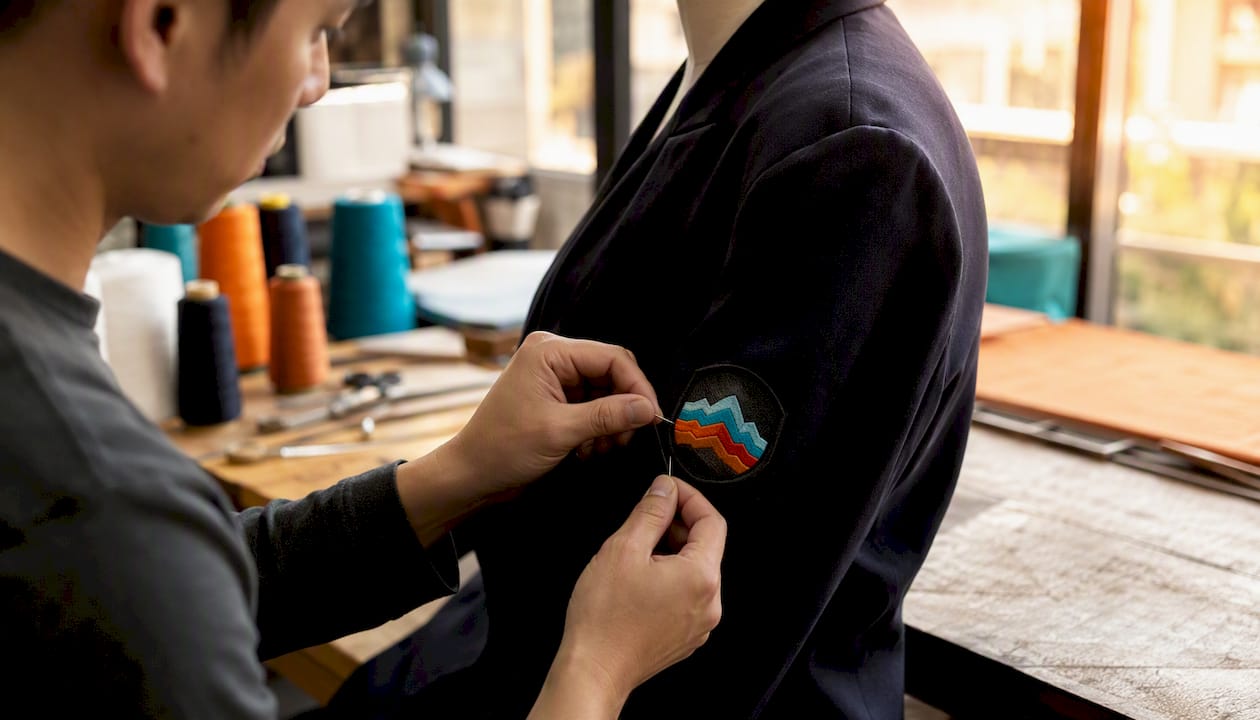
For most business jackets, an embroidered patch with a merrowed edge and iron-on backing plus sew-on reinforcement is the right call. It reads as professional from ten feet away, survives years of dry cleaning, and works on blazers, softshells, and work jackets alike. Woven patches are the better pick only when your logo has fine text or thin line work that embroidery thread can’t hold.
Embroidered patches earn their reputation because thread has texture and depth that printed logos can’t fake, and a stitched patch signals durability the moment someone looks at it. That perceived quality matters when the patch is the first thing a client or new hire notices on your team.
Budget a few dollars per patch at typical order sizes, as most suppliers set a minimum order quantity of a few dozen pieces. Standard production takes a couple of weeks after art approval; rush turnaround is usually available for an added fee.
Here’s the short path to getting patches on jackets:
-
Get a quote. Send your logo and jacket details to a patch supplier and ask for pricing at your expected quantity.
-
Approve a digital proof. Review colors, size, and stitch detail before anything goes into production.
-
Place the order and confirm backing. Decide sew-on versus iron-on before production starts, not after.
Key Takeaways
Embroidered patches with sew-on backing, ordered through a supplier with in-house production and free digital proofs, give business jackets the most durable and professional result for the price.
Table of Contents
- Which Type of Custom Patch Works Best for a Business Jacket?
- What Backing Should You Choose to Attach the Patch?
- What Size and Placement Look Right on a Business Jacket?
- What Artwork Do You Need to Submit for Patch Production?
- How Much Do Custom Patches Cost, and What’s the Lead Time?
- How Do You Place an Order From Quote to Delivery?
- Should You Apply Patches Yourself or Hire a Professional?
- How Long Do Patches Last, and How Should You Care for Them?
- How Jam 4 Apparel’s In-House Model Simplifies Patch Orders
- What Do Most Companies Get Wrong When Ordering Jacket Patches?
- How Jam 4 Apparel Can Handle Your Business Jacket Patches
- Sources
Which Type of Custom Patch Works Best for a Business Jacket?
Six patch styles cover almost every business use case, and picking the wrong one is the single most common reason companies end up redoing an order. Each has a distinct look, feel, and price point.
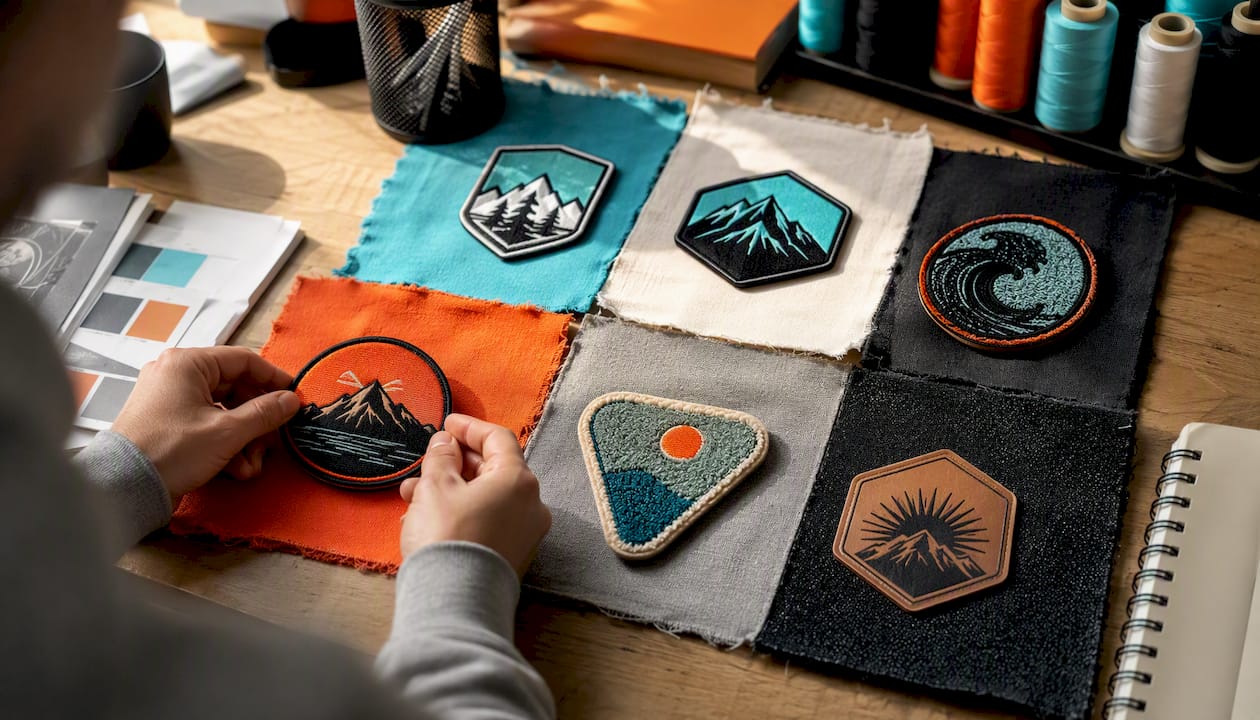
Embroidered patches use thread stitched over a fabric backing, usually with a merrowed or hot cut border. They’re the default for corporate jackets because the raised texture looks premium and holds up to years of wear. Detail is limited, though. Thin lines and tiny text under about a quarter inch tend to blur together.
Woven patches are made on a loom with finer thread, so they render small text and gradient shading that embroidery can’t. They sit flatter against the jacket fabric, which some brands prefer for a sleeker corporate look.
Printed (sublimated) patches use dye transferred directly onto polyester fabric. They’re the cheapest way to reproduce a photo-realistic logo or complex color gradient, but they don’t have the tactile quality buyers associate with “premium.”
PVC patches are molded rubber, waterproof, and nearly indestructible outdoors. They work well on utility jackets and safety gear, less so on a tailored blazer where they’d look out of place.
Chenille patches use thick yarn for a raised, collegiate letterman look. Rare on business jackets, but occasionally used for varsity-style spirit wear tied to a company culture initiative.
Leather patches are debossed or laser-etched and read as rugged, premium branding. They show up on outdoor brand jackets and premium workwear more than on standard office attire.
Pro Tip: If your jacket fabric has any stretch to it (softshell, fleece, performance blends), avoid rigid PVC or leather patches. They can crack or peel at the seams as the fabric flexes. Stick with embroidered or woven for anything with give.
What Backing Should You Choose to Attach the Patch?
The backing determines whether your patch is permanent, removable, or somewhere in between, and that decision affects both cost and how the jacket gets used day to day.
Sew-on backing is thread stitched directly through the patch and jacket fabric. It’s the most durable option and the industry standard for uniforms that go through repeated washing or dry cleaning. It requires a needle and thread (or a machine) to apply, which adds labor time.
Iron-on (heat-seal) backing has an adhesive layer activated by a household iron or heat press. It’s fast and requires no sewing skill, but the bond weakens with repeated washing unless it’s reinforced with a few stitches at the edges.
Hook and loop (Velcro) backing lets you swap patches in and out, which matters for jackets shared across shifts or rental uniforms where names or titles change. It’s the least durable under heavy movement since the fabric loop side can wear down.
Adhesive (peel-and-stick) backing is meant for temporary use, like a trade show or single event. It’s not recommended for daily wear.
Magnetic backing avoids putting any holes or adhesive on the jacket at all, which appeals to rental fleets or loaner jackets that need to stay pristine.
| Backing Type | Durability | Best For | Removable |
|---|---|---|---|
| Sew-on | Highest | Daily-wear uniforms, dry-cleaned jackets | No |
| Iron-on | Moderate | Quick application, lighter-use jackets | No (without damage) |
| Hook and loop | Moderate | Shared jackets, frequent swaps | Yes |
| Adhesive | Low | Single events, temporary branding | Yes |
| Magnetic | Moderate | Loaner or rental jackets | Yes |
For a company jacket that’s staying on one employee’s back for years, sew-on wins every time. For a fleet of loaner jackets rotating between staff, hook and loop or magnetic backing saves you from re-ordering patches every time someone leaves.
What Size and Placement Look Right on a Business Jacket?
Size and placement communicate almost as much as the logo itself. A patch that’s too big looks like a costume; too small and it disappears.
Left chest is the standard spot for a primary company logo, typically sized between 2.5 and 4 inches wide. This is the position people instinctively look at first when meeting someone.
Right chest is common for a secondary mark, an employee name, or a role title, usually kept smaller at 2 to 3 inches.
Sleeve/shoulder placement works for a secondary brand element or a partnership logo, generally 2 to 3 inches, and reads less formal than chest placement.
Back yoke placement is reserved for larger branding statements, often 6 to 10 inches wide, and shows up more on work jackets and outerwear than on tailored blazers.
Jacket style changes the math. A structured blazer calls for a smaller, cleaner patch on the left chest only, nothing else. A softshell or work jacket can carry a left chest logo plus a name patch on the right and still look intentional. Before ordering, lay an existing jacket flat and measure the chest panel width and length available above any zippers or seams. Suppliers can size the patch to fit that space rather than guessing from a generic template.
What Artwork Do You Need to Submit for Patch Production?
The single biggest cause of delayed orders is artwork that isn’t ready for production. Getting this right the first time saves a week or more.
File formats: Vector files, SVG, EPS, or PDF, are strongly preferred because they scale to any size without losing crispness. A logo built in Adobe Express or Canva’s logo maker can export these formats directly. If you only have a raster file (JPG or PNG), it needs to be high resolution, ideally 300 DPI at the final patch size, and simple enough that embroidery digitizing software can trace it cleanly.
Detail limits vary by patch type. Embroidery translates bold shapes and limited color palettes best; anything with gradients or text smaller than a quarter inch risks becoming an unreadable blob of thread. Woven and printed patches hold finer detail and can reproduce more color variation.
The proofing sequence generally runs like this:
- Submit your logo file and specify patch size, backing, and quantity.
- Receive a digital proof showing colors, stitch layout, and dimensions, typically within a few business days.
- Request revisions if colors or scale look off, most patchmakers include one or two rounds free.
- Approve the final proof before production starts.
Before you submit anything, run through this quick checklist: dimensions at actual patch scale, exact color callouts (Pantone numbers if you have them), fonts outlined or converted to vector paths, and no low-resolution screenshots pulled from a website. Turbologo’s export tools are worth a look if you need to generate clean vector files from an existing raster logo.
How Much Do Custom Patches Cost, and What’s the Lead Time?
Pricing scales with patch size, complexity, and quantity, and the swings between low and high volume are bigger than most first-time buyers expect.
Rush production, when a supplier can accommodate it, generally adds 15% to 30% to the base cost and cuts the timeline to under a week. Setup or digitizing fees (converting your logo into embroidery machine instructions) are common on the first order and usually waived on reorders since the file is already saved.
Shipping is where surprise costs sneak in. If your jacket order and your patch order come from two different vendors, you’re paying for the patches to ship once and then paying labor to apply them, sometimes at a third location. Consolidating patches and jacket decoration under one supplier removes at least one shipping leg and one handoff where things can go wrong.
How Do You Place an Order From Quote to Delivery?
The ordering process has six checkpoints, and skipping any one of them is how orders end up delayed or wrong.
- Request a quote. Provide your logo, target quantity, patch size, and preferred backing so the supplier can price it accurately.
- Submit final artwork. Send vector files where possible; confirm exact Pantone colors if brand consistency matters.
- Review the digital proof. Check size, color accuracy, and stitch or weave detail against your actual jacket, not just on screen.
- Approve or request a physical sample. For large orders or anything going on an executive uniform, a single physical sample before full production catches problems a digital proof can’t show, like how thread color actually looks under office lighting.
- Production run. Confirm your delivery date against the quoted lead time before this stage begins.
- Delivery and application. Decide in advance whether patches ship loose for in-house application or get sewn onto jackets by the supplier.
Pro Tip: If you’re ordering the same logo across multiple jacket sizes or two different backing types (say, sew-on for staff and hook and loop for contractors), tell your supplier upfront. Running one combined production batch instead of two separate orders often knocks a meaningful chunk off the per-piece price.
Anyone coordinating uniforms for a whole team should also look at how custom work uniform orders typically get structured, since the patch and the jacket order often move through the same approval steps.
Should You Apply Patches Yourself or Hire a Professional?
The DIY-versus-professional decision comes down to how permanent you need the result and how many jackets you’re doing at once.
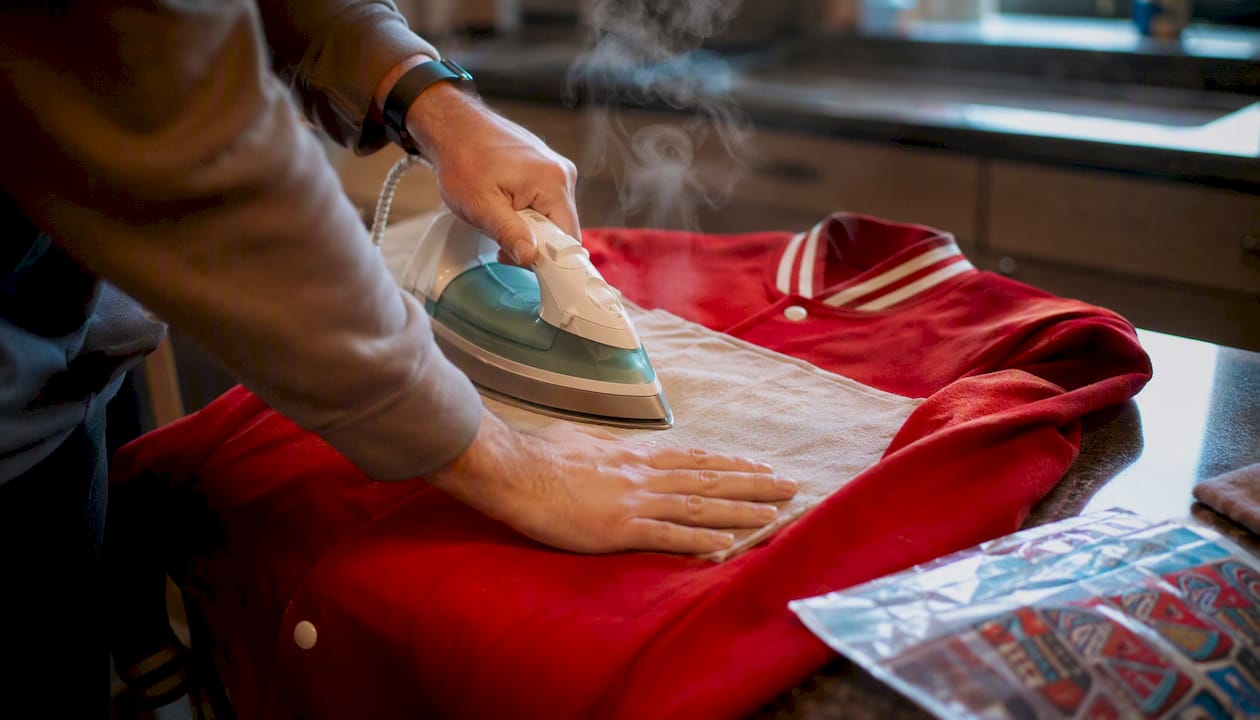
DIY iron-on application requires a household iron, a hard flat surface, a pressing cloth, and about 30 to 60 seconds of firm, even heat per patch. It works fine for a handful of jackets but the bond degrades faster under regular washing.
DIY adhesive patches just peel and stick, no tools needed, but they’re built for short-term use and will lift within days of regular wear.
Sewn-on installation is the recommendation for anything meant to last the life of the jacket. A patch stitched down, ideally with a lockstitch around the merrowed edge, won’t lift at the corners the way an iron-on patch eventually will.
- Position the patch and pin or temporarily tape it in place.
- Use a heavy-duty needle and matching or clear thread.
- Stitch around the entire perimeter, following the existing edge of the patch.
- Backstitch at the start and finish to lock the thread.
Professional sew-on labor generally runs somewhere in the range of a few dollars per patch when done in bulk by the same supplier producing the patches, versus a per-item tailor fee that adds up fast if you’re outsourcing installation separately from production.
For jackets that rotate between multiple people, hook and loop or magnetic backing avoids the labor cost of resewing every time staff changes.
How Long Do Patches Last, and How Should You Care for Them?
Sewn embroidered patches are the most durable option in daily wear, often outlasting the jacket fabric itself if the thread quality is decent. Iron-on backing is the weak link over time; expect edges to start lifting after repeated hot washes or dry cleaning cycles.
Washing guidance by backing type:
- Sewn patches: machine wash and dry cleaning are both fine, no special handling needed.
- Iron-on patches: turn the jacket inside out and wash on cold, avoid high heat drying.
- Adhesive patches: hand wash only, or better, don’t wash them at all.
Durability by patch type: embroidered patches resist fraying well but loose threads can snag; woven patches hold their flat shape longer under repeated folding; PVC patches are essentially waterproof and abrasion resistant but can crack if bent sharply in cold weather.
If threads start to fray or an edge lifts, a quick re-stitch by a tailor solves it in minutes. Reputable suppliers back their work with some form of quality guarantee, so it’s worth asking before you order whether rework or replacement is covered if a patch fails prematurely due to a production defect.
Store off-season jackets flat or on a wide hanger rather than folded, since sharp creases across a patch can eventually crack embroidery backing or PVC. Treat stains on the surrounding fabric quickly. Solvent-based stain removers can discolor certain patch dyes if left to sit.
How Jam 4 Apparel’s In-House Model Simplifies Patch Orders
In-house production removes the guessing game that comes with outsourced patchmaking. When embroidery happens under the same roof as the rest of an apparel order, quality control checks happen at every stage instead of only at final inspection, and lead times shrink because nothing sits waiting in a queue between separate vendors.
Two trust signals worth checking for with any supplier, patch or otherwise:
- Free digital proofs before production. You should see exact colors, sizing, and stitch layout before a single patch gets made.
- A rework or quality guarantee. If a patch arrives with a production defect, that should be corrected at no added cost, not treated as a new order.
A typical business client workflow looks like this: a company sends over its logo, gets a proof back within a few business days, approves colors and sizing, and receives finished embroidered patches within two to three weeks, ready to sew onto a batch of staff jackets.
A predictable quote, a proof you can actually review before anything’s stitched, and a turnaround date that holds. That’s the whole ask from a business ordering patches for the first time, and it’s surprisingly rare to get all three from one supplier.
— Adam, Jam 4 Apparel
What Do Most Companies Get Wrong When Ordering Jacket Patches?
The most common failure point isn’t the supplier, it’s the artwork. Logos submitted as low-resolution screenshots or PDFs exported from a slide deck almost always need to be redone before they’ll digitize cleanly for embroidery. If your logo has fine text under a quarter inch or a subtle gradient, expect a supplier to flag that the detail won’t survive the stitch. Better to hear it during the proof stage than after 200 patches are already sewn.
Color mismatches cause the second most rework. “Navy” means something different to every screen and every thread manufacturer. If brand color accuracy actually matters to your company, ask for a physical sample before committing to a full production run. It costs a little time upfront and saves you from a batch of patches in the wrong shade of blue.
On the operational side, order more patches than your current headcount. Staff turnover, damaged jackets, and new hires all eat into a patch inventory faster than most managers expect.
Pro Tip: Keep a small stock of spare patches and a spool of matching thread color noted in your files. When a new hire starts or a jacket needs replacing, you skip the reorder wait entirely.
How Jam 4 Apparel Can Handle Your Business Jacket Patches
Jam 4 Apparel builds patches the same way it builds every other custom order: in-house, with a free digital proof before anything goes into production. That combination is what keeps your timeline predictable and your final product matching what you actually approved, not a surprise that shows up in the box three weeks later.
Whether you need embroidered patches for a full staff of corporate jackets or a small batch for a leadership team, the process stays the same: send your logo, get a proof, approve it, and production starts. Corporate apparel clients commonly pair patch orders with broader uniform programs, and Jam 4 Apparel’s embroidery services cover both the patches themselves and the stitching needed to apply them to the jacket. If you’re also weighing other branded touches for clients or staff, a paired gift like personalized drinkware rounds out a branding package nicely alongside the jacket patch.
Ready to move forward? Request a quote through Jam 4 Apparel’s site with your logo and jacket details, and ask about a physical sample if color accuracy matters for your brand.
Sources
Building your own logo file before you contact a patchmaker saves a round of back and forth. Adobe Express’s logo maker and Canva’s logo tools both export the vector formats most patch suppliers ask for, and both let you save a brand kit so you’re not hunting for the right shade of blue every time you order something new.
If you want visual reference for how different patch styles actually look once they’re finished, browsing a general patch retailer’s catalog shows real embroidered and iron-on examples, though a catalog like that is for inspiration only. Get an actual proof and sample from whoever produces your patches before approving a business run.
Before committing to any unfamiliar supplier, a quick BBB profile check can surface complaint patterns worth knowing about, and it’s standard practice across the promotional products industry to have this kind of third-party record available for review.
- Free Logo Maker: Design Custom Logos | Adobe Express
- Logo Maker | Create Free Logos in Minutes | Canva
Recommended
Ready to print your design?
Screen print, embroidery, and DTF — no minimums on many styles.