Business Uniform Compliance Checklist for Growing Teams
August 18, 2026
Business Uniform Compliance Checklist for Growing Teams
A working uniform program comes down to one thing: a checklist you actually use, every time you order. Get sizing, artwork, quantities, and sample approval nailed down on paper before money changes hands, and you eliminate almost every reorder headache that plagues small businesses, schools, and sports programs.
Here’s the field-ready version. Copy it into a document, fill it in before you place your next order, and keep it on file for every reorder that follows.
- Role and recipient — who wears this garment, and where it ships
- Garment type, cut, and blank brand — exact style code, not just “polo shirt”
- Decoration method and placement — embroidery, screen print, or DTF, with exact coordinates
- Approved artwork file — vector format, correct color codes, on file with a version date
- Measurements — chest, waist, inside leg, recorded per person, not guessed by shirt size
- Sample approval status — signed off, with a photo, before the full run starts
- Quantities plus safety stock — enough for the roster, plus a cushion for growth and damage
- Lead time — production plus shipping, with a buffer for one round of corrections
- PO or contract reference — a paper trail tying the order to an approved quote
- Packing and labeling rules — individually bagged, name tagged, sorted by size or by person
Every one of those ten lines belongs in a single master spec document. Keep it in one place, one owner, one version at a time. At Jam4apparel, that master file is what lets a school reorder team polos two years later and get the exact same navy, the exact same chest logo placement, without a single email of back and forth.
Key Takeaways
A reliable uniform program depends on measurement-based sizing, one locked master spec, and a signed sample approval before every production run.
| Point | Details |
|---|---|
| Measure, don’t guess | Collect chest, waist, and inside-leg measurements per person instead of relying on generic size labels. |
| Keep one master spec | Store garment SKUs, decoration coordinates, and approved artwork in a single versioned document. |
| Require sample sign-off | Approve a signed proof and photo before any full production run begins. |
| Set reorder triggers | Plan safety stock and reorder budgets tied to roster turnover, not reactive scrambling. |
| Lock vendor terms | Require a named contact, file retention, and defect remediation clauses in every contract. |
Table of Contents
- What Belongs on a Business Uniform Compliance Checklist?
- How Do You Collect Accurate Uniform Measurements?
- Setting Artwork and Decoration Standards That Never Drift
- Planning Lead Times, Quantities, and Reorders
- Building a Sample Approval and Quality-Control Gate
- Keeping Records Straight for Every Reorder
- Choosing a Vendor and Locking Down Contract Terms
- Where Uniform Programs Usually Go Wrong
- A Master-Spec Template You Can Use Today
- What Fifteen Years of Watching Uniform Orders Go Wrong Teaches You
- Frequently Asked Questions
- Sources
What Belongs on a Business Uniform Compliance Checklist?
Each line item above breaks down into specific fields you can drop straight into a purchase order or a request for quote. Vague requests are where uniform orders go sideways.
For the garment, record the brand name, style code, color name (not just “navy,” but the exact shade code the blank manufacturer uses), and SKU. Mixing blank brands within the same role is one of the most common and avoidable mistakes we see. If half your coaching staff gets a Gildan polo and the other half gets a Bella+Canvas polo, the fit, the fabric weight, and the color will all read differently side by side, even if both are technically “navy.”
For decoration, log the method (embroidery, screen print, DTF), the placement measurement (left chest, 3.5 inches wide, centered 3 inches below the shoulder seam), and the exact color match, either a Pantone number for print or a thread chart number for embroidery.
For sizing, the fields are chest, waist, and inside leg, plus the tolerance you’ll accept (usually a half inch either way). A uniform program built around measurement capture rather than guessed sizing avoids the single biggest cause of reorders: garments that don’t fit.
A well-built master spec should let any vendor, not just the one you used originally, reproduce identical results. That means specifying file types (vector .ai or .eps for logos, not a low-resolution PNG pulled off a website), exact color codes, stitch counts for embroidery, and placement coordinates measured from a fixed reference point like a seam or collar, not “somewhere on the chest.”
Pro Tip: Version your master spec every time you touch it. Label it “Team Polo Spec v3, updated March 2026” so nobody accidentally reorders from an outdated file with the wrong logo size.
Sizing mistakes are not a minor inconvenience. Industry guidance built around fitting-day protocols and role-based blank selection exists specifically because skipping measurement-based sizing in favor of generic labels drives returns as high as 30% of a shipment on some bulk orders. That’s nearly a third of a run coming back for exchange, at your cost, on your timeline.
How Do You Collect Accurate Uniform Measurements?
Measure, don’t guess. Every seasoned procurement team that runs a uniform program without chronic return problems starts here, and every one that skips it eventually pays for it in exchanges and rush reorders.
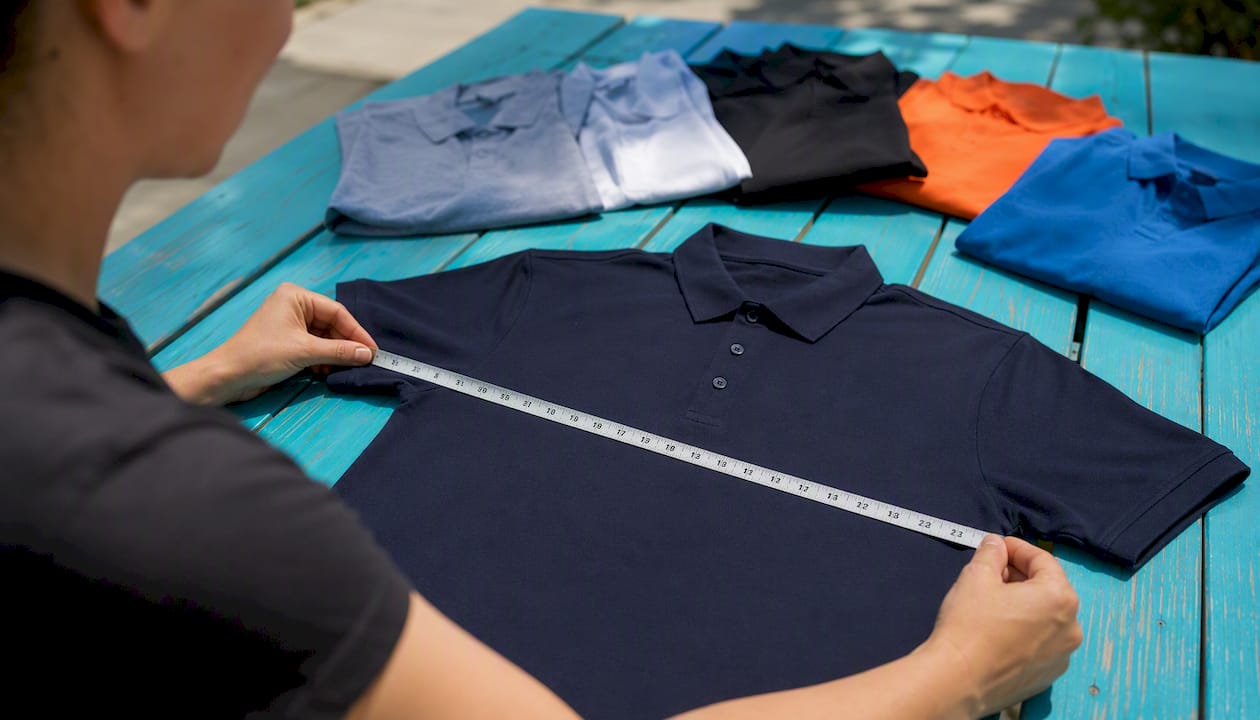
The three measurement points that matter most are chest, waist, and inside leg. Chest gets measured around the fullest part, waist at the natural waistline, and inside leg from the crotch seam to the ankle bone. Bring a soft tape measure, get informed consent before touching anyone, and record every number against a name, not just a shirt size guess shouted across a locker room.
A fitting day works best as a scheduled event, not a scramble. Set aside an hour, bring a small stock of sample garments in a spread of sizes, and have each person try one on before you record their final size. Keep that roster. It should travel with every future order for that person, whether it’s a new standing team member or a coach ordering a replacement three seasons later.
Once you have raw measurements, map them to size labels using the blank manufacturer’s own size chart, not a generic “small, medium, large” assumption. Build your size-allocation plan from that roster: order the exact size mix your roster calls for, plus a small buffer at the most common sizes for new hires or new players joining mid-season.
Pro Tip: Before you commit to a full order, run a small pilot group through a real practice or workday. Mockups on a screen don’t tell you if a fabric breathes, if a collar chafes, or if a seam rubs during actual movement. A short wear trial catches functional problems no size chart will ever reveal.
Setting Artwork and Decoration Standards That Never Drift
Pick one decoration method and one placement per garment type, then write it down. That single decision, locked into your master spec, is what keeps your polo logo in the exact same spot whether you order 20 shirts in March or 200 more in September.
Artwork files need to arrive as vector formats (.ai, .eps, or high-resolution .pdf), never a compressed image pulled from social media. Color has to be locked to a specific standard: Pantone codes for screen print and DTF, thread chart numbers for embroidery. A logo placement guide that specifies exact inch measurements from a fixed seam reference removes the guesswork that causes logos to drift half an inch higher or lower between production runs.
Different garments call for different decoration methods, and the choice isn’t arbitrary. Embroidery holds up best on polos and structured caps because it survives repeated industrial washing without cracking. DTF and screen print work well on cotton tees and hoodies where a larger, more colorful graphic matters more than long-term wash durability. A side-by-side comparison of decoration methods helps match the right technique to the right blank before you commit to a full order.
| Garment type | Recommended method | Why |
|---|---|---|
| Polos and dress shirts | Embroidery | Withstands frequent industrial washing without cracking |
| Cotton tees and hoodies | Screen print or DTF | Handles large, multicolor graphics affordably |
| Performance/athletic wear | DTF or heat transfer | Stretches with fabric without cracking like traditional print |
| Structured caps | Embroidery | Holds shape and detail on curved surfaces |
Before any full production run starts, require a signed digital proof and a physical sample photo. That two-part gate, proof plus photo, catches placement and color problems while they’re still cheap to fix.
Planning Lead Times, Quantities, and Reorders
Plan for your initial order, a safety buffer, and an annual reorder budget, and set all three before you place your first PO. Skipping this step is how programs end up paying rush fees every fall.
Calculate your initial order by role: count exact roster numbers per size, then add a small cushion, often 5 to 10 percent, to cover growth, damage, and new hires. From there, budget for annual reorders tied to expected staff turnover or team growth rather than reordering reactively when you run out.
Set a reorder trigger at a specific stock threshold, for example when you’re down to your smallest three sizes in stock, and build in a lead-time margin of at least two to three weeks beyond the vendor’s quoted production time. Document your minimum order quantities, your preferred packaging (individually bagged and labeled versus bulk boxed), and your per-size stocking rules directly in your master spec so nobody has to reconstruct that logic from memory next season.
Pro Tip: Stick to one blank brand per garment type across your entire program, even if it means a slightly higher unit cost. Reordering three shirts next year from a vendor who already has your exact blank, color, and decoration spec on file is a one-email transaction. Reordering from scratch because your original blank got discontinued is a multi-week project.
Building a Sample Approval and Quality-Control Gate
Sign off a sample, then inspect a batch sample on receipt. Both steps happen before garments reach your team, not after complaints start coming in.
A receiving inspection should check artwork match against the approved proof, placement against the spec’s exact coordinates, color against the Pantone or thread reference, seam integrity, label accuracy, and packaging or individualization if you ordered names or numbers. Pull a genuinely useful sample size, not just the top garment in the box, and document any defect with a photo and a batch number so your vendor can trace exactly what went wrong.
| QC checkpoint | What to verify | Action if it fails |
|---|---|---|
| Artwork match | Compares to signed proof | Flag and hold shipment |
| Placement | Matches spec coordinates | Request remake for affected units |
| Color | Matches Pantone/thread code | Document and escalate to vendor |
| Seams and stitching | No loose threads, even stitching | Reject unit, request replacement |
| Labeling | Correct size, name, number | Correct before distribution |
Know your rejection threshold in advance. If more than a small percentage of a sample batch fails inspection, escalate the entire order rather than distributing flawed garments and hoping nobody notices. A simple post-production run log tracking garment type, batch number, and any issues found makes it far easier to diagnose problems and replicate successful runs later.
Keeping Records Straight for Every Reorder
One source of truth reduces errors, and that source of truth is your master spec, stored in one place with one clear owner. A shared drive folder works fine as long as everyone on your team knows exactly where to find the current version.
Your master spec should include garment SKUs, decoration specs and placement coordinates, approved artwork files, stitch counts for embroidery, your supplier’s contact details, a photo from the last approved sample, and a version number with a date and the name of whoever signed off. Keeping this file consolidated is what turns a reorder into a five-minute email instead of a full re-quote from scratch.
Alongside the spec, maintain your employee or team roster with sizes tied to each person’s record, updated whenever someone joins, leaves, or requests a size change.
Pro Tip: Keep one physical sample garment on site, tagged and dated, even after the order ships. When someone joins mid-season and needs a fitting, or a vendor discontinues a blank and you need to match the old fabric, having the real garment in hand beats trying to describe it from memory.
Choosing a Vendor and Locking Down Contract Terms
Require a purchase order, a named account manager, and file retention for reorders before you commit to any uniform vendor. Those three things determine whether your next order is smooth or painful.
Your contract or PO should specify a sample approval gate before production, a signed proof and photo requirement, some form of credit or remake policy for defects found on delivery, agreed lead times specifically for reorders (which should be faster than a first-time order), and a commitment that the vendor stores your master files and specs for future use.
On the operational side, ask about net payment terms, whether the vendor can hold your roster on file between orders, typical reorder turnaround time, and whether production happens in-house or gets outsourced. In-house production generally means tighter quality control and faster turnaround, since the same team handling your artwork also runs the presses and embroidery machines, with fewer handoffs where mistakes creep in.
Where Uniform Programs Usually Go Wrong
Most problems in a uniform program are operational, not creative, and every one of them is preventable with a spec and a roster. Sizing chaos, inconsistent decoration, and reorder friction all trace back to skipped steps, not bad luck.
- Relying on generic “unisex” sizing — fix it by measuring every person and mapping to the manufacturer’s actual size chart
- Mixing blank brands across a role — fix it by locking one brand and style code per garment type in the spec
- Skipping sample approval — fix it by requiring a signed proof and photo before any production run
- Inconsistent decoration methods across runs — fix it by writing the method and placement into the master spec, then never deviating
- Poor record-keeping — fix it by assigning one owner to the master spec and updating the version date every time it changes
Poor fit tied to generic sizing shortcuts is a documented driver of the return-rate problem mentioned earlier, and it compounds every time a program skips measurement in favor of convenience. If you fix nothing else on this list, fix that one.
Pro Tip: Enforce a single decoration method per garment type across your entire program, no exceptions. The moment one order gets embroidered and the next gets screen printed on the same polo style, your team looks like two different organizations in the same photo.
A Master-Spec Template You Can Use Today
Here’s a compact starting template. Fill in each field before you send your next order to any vendor.
- Garment SKU: [Vendor style code, e.g., Gildan 64800]
- Blank brand: [Manufacturer name]
- Decoration method: [Embroidery / screen print / DTF]
- Placement coordinates: [e.g., left chest, 3.5" wide, 3" below collar seam]
- Approved artwork file: [File name and version date]
- Sample photo on file: [Yes/No, date approved]
- PO reference: [Order or contract number]
At Jam4apparel, that same structure runs behind every custom work uniform order we produce, from a single martial arts academy ordering thirty gis to a school district reordering staff polos three years running. Because production happens in-house, the sample approval and QC steps happen under one roof instead of getting passed between subcontractors, which is usually where placement and color drift creep in.
Pro Tip: Before your first order ships, run this final sign-off checklist: artwork approved and signed, sample photo on file, sizes mapped to a real roster, quantities matched to that roster plus buffer, and PO number issued. If any one of those five is missing, hold the order.
What Fifteen Years of Watching Uniform Orders Go Wrong Teaches You
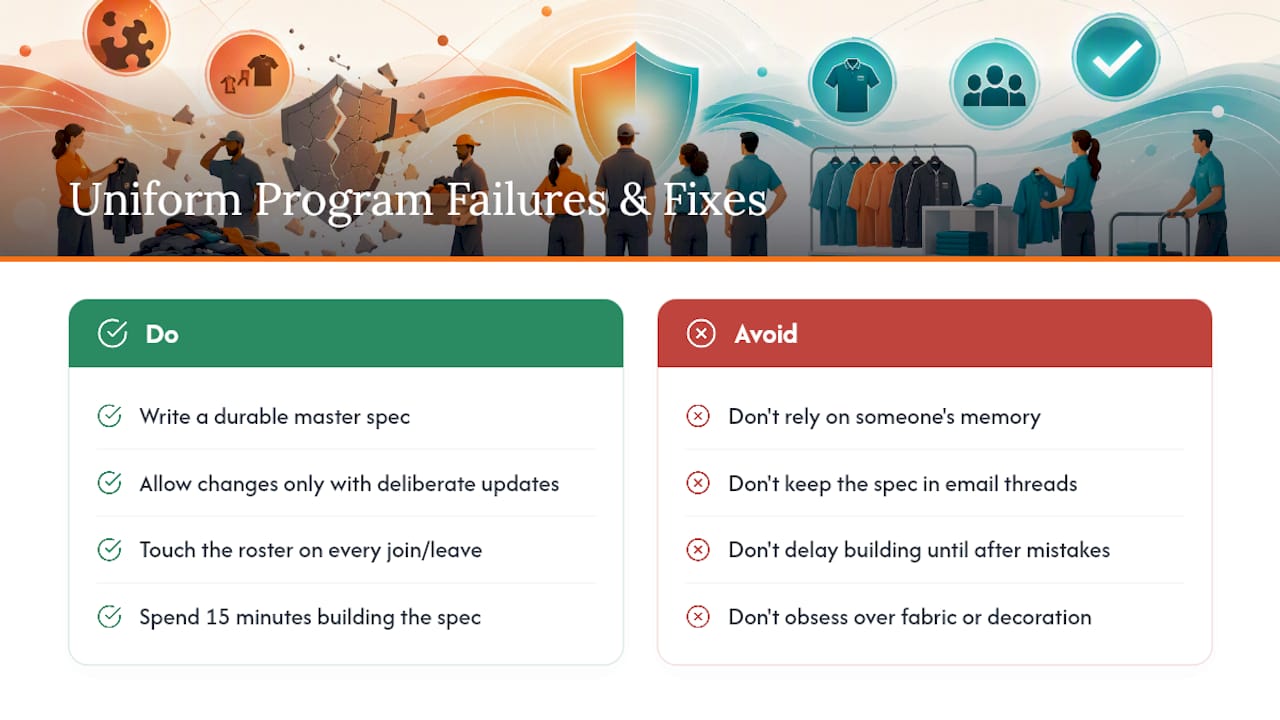
Most uniform programs don’t fail because of bad decoration or cheap fabric. They fail because nobody wrote anything down. The spec lived in someone’s email thread, the sizes lived in someone’s memory, and when that person left the organization or moved on to a different role, the whole system collapsed with them.
The conventional advice on uniform ordering tends to focus on picking the “best” fabric or the flashiest decoration method, and those choices matter less than people think. What actually separates a smooth multi-year uniform program from a recurring headache is boring: a document that doesn’t change unless someone deliberately updates it, and a roster that gets touched every time someone joins or leaves.
If you order uniforms once a year for a school or a sports team, you can survive without a formal system for a while. If you’re running a business with rotating staff, seasonal hires, or multiple locations, the lack of a written spec eventually costs you real money in mismatched reorders and rush shipping fees. The fix isn’t more expensive apparel. It’s fifteen minutes spent building the document this article just walked you through, before your next order, not after the next mistake.
Reuse the templates here for your next order, and if you’d rather have a team build and hold that master spec for you, Jam4apparel’s industry pages show how programs across schools, restaurants, and corporate teams get structured from day one.
Frequently Asked Questions
What is a business uniform compliance checklist used for?
It’s a working document that tracks every field a uniform order needs, garment specs, sizing, artwork, quantities, and sample approval, so orders and reorders come out identical every time.
How often should I update my master spec document?
Update it whenever any field changes: a new blank brand, a revised logo, a new decoration placement, or a supplier switch. Version and date it each time so old copies don’t get used by mistake.
Do I need to measure every team member, or can I use standard sizing?
Measure individually where possible. Generic sizing, especially unisex-only labels, is a leading cause of returns and exchanges in bulk uniform orders.
What should a sample approval process include?
A signed digital proof matching your artwork specs, plus a physical sample photo confirming placement, color, and fabric before the full run goes into production.
How much safety stock should I keep on hand?
A common approach is ordering 5 to 10 percent above your current roster count, adjusted for expected turnover, growth, or seasonal hiring.
Sources
- How Businesses Should Order Custom Uniforms in Bulk (Sep-by-Step)
- The ultimate custom apparel checklist for small businesses – DIYPRINTZ
- How to Spec a Uniform Program for 50–500 Employees: A Procurement Checklist | Singhs Print
Recommended
Ready to print your design?
Screen print, embroidery, and DTF — no minimums on many styles.